11 Top-Quality, Reliable, and Robust Shed Foundation Options
Are you worried about space constraints in your yard and garage? Don’t worry. You need to build a shed to find more space and keep things organized. How to build a shed? The first thing you should look for is to create a shed foundation. It doesn’t matter whether you want to buy or create a shed; you need to have a strong shed foundation. A proper base offers the best support to your shed. What are the best shed foundation options available today? Here are the 11 top-quality, reliable, and robust shed foundation options available for you.
1. Shed Foundation with Concrete Pavers
Concrete pavers are an excellent choice on flat grounds for smaller sheds. The level ground makes it easy for you to lay pavers. You can use sand to make leveling easier. Concrete pavers are available in a wide variety of shapes, sizes, and colors.
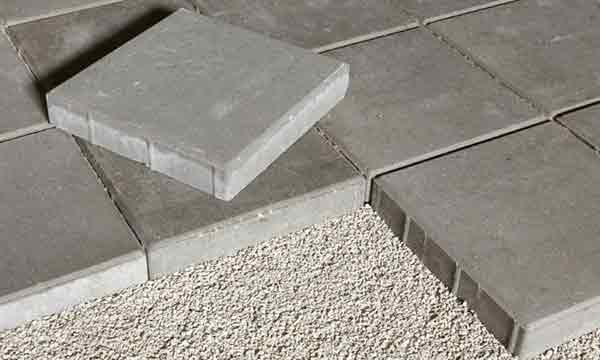
Pavers can be a cost-effective option for a shed foundation, with the whole foundation being built for just a few hundred dollars. They are easy to work with, less messy than concrete. They are also ideal for flat ground and provide full support for the shed frame and floor. However, pavers can be difficult to install on slopes, may settle and become uneven, and are not suitable for extreme weights or frost heaves. In conclusion, using pavers for a shed foundation can be a budget-friendly and straightforward option, but it’s important to consider their limitations and ensure that the shed is built on level ground.
Tutorial Video:
2. Solid Concrete Blocks
Solid concrete blocks make the easiest foundation even for beginners. You can use this foundation for any sized shed, including pre-fab and DIY sheds. These blocks can be stacked and leveled with great ease.
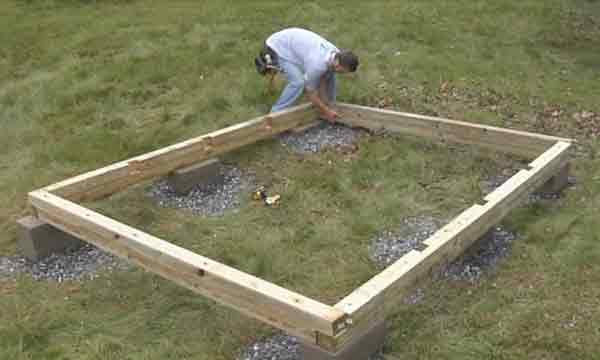
Image by finehomebuilding.com
3. Deck Blocks
Deck blocks come with a square based-pyramid shape and make an excellent choice for all types of sheds. You can even use them for cabins and cottages. Installation and leveling can be done easily. For wooden framing, you can find channels on the top.
Pros:
Quick and easy installation: Setting up this foundation is fast and straightforward, saving time and effort.
Easy to level: Adjusting the blocks for a level surface is simple, ensuring a stable foundation for the shed.
Suitable for small or large sheds: Whether you have a compact storage shed or a larger workshop, these blocks can accommodate various sizes.
Cons:
May sink over time: There’s a risk of the blocks gradually sinking, potentially causing instability and unevenness.
Lack of support between blocks: The distance between blocks doesn’t provide sufficient reinforcement, which could lead to shifting or sagging.
Not suitable for sloped surfaces: This foundation is not recommended for uneven terrain, as it may not provide adequate stability.
4. Gravel Pad and Timber Frame
If you are looking for one of the best shed foundation options for flat ground, you can choose gravel and timber frame. Beginners may find it a bit hard due to the size. This foundation is a good choice for sheds with or without a floor.
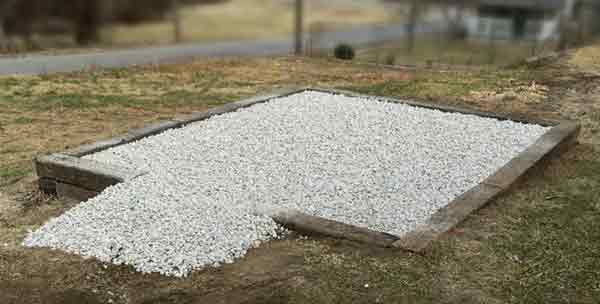
Image by Classic Buildings
5. Skid Foundations
Novices can use this option to build a foundation for their sheds. The skids or runners sit directly on the ground and provide the best support for the shed to sit evenly on the ground. If you have flat terrain, skid foundations are a top choice. Further, they let you create a movable shed.
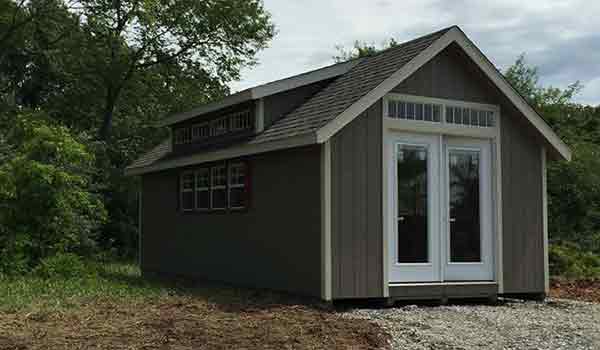
Image by Shed to House
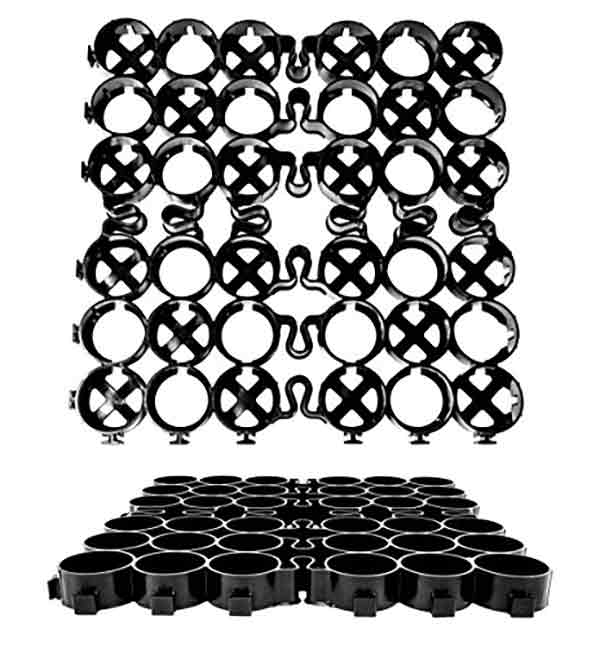
6. Plastic Foundations
Plastic foundations, also known as plastic garden shed base grids are made using recycled material. This type of foundation sits directly on the ground. If you have flat ground available, the plastic foundation is one of the best choices available for home-built or pre-built sheds.
7. Kit from Manufacturer
You can find small shed manufacturers, who offer foundation kits for flat areas. You can carry these foundation pieces with effortless ease. The installation and leveling process can be completed easily. These kits are an excellent option for smaller sheds.
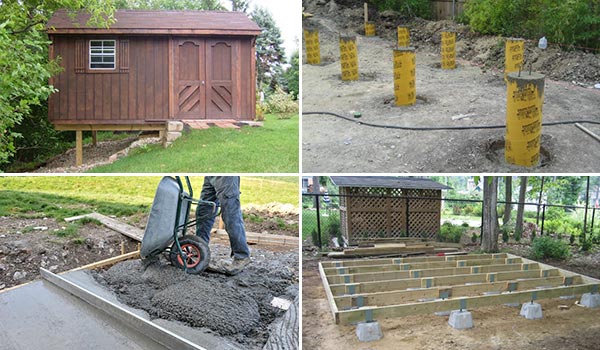
8. Concrete Piers and Beams Foundation for a Shed
These foundations offer outstanding benefits for users. However, you need to make some extra efforts to build these foundations. They are a top choice for prefab and home-built sheds.
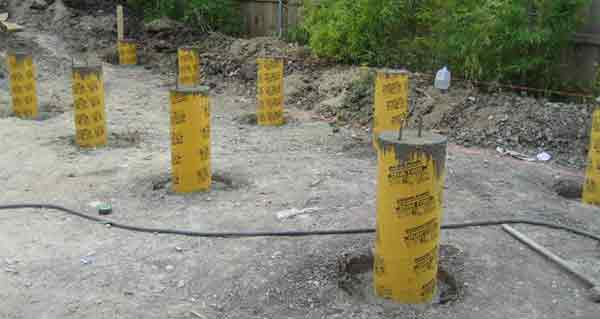
Image by Green Button Homes, LLC
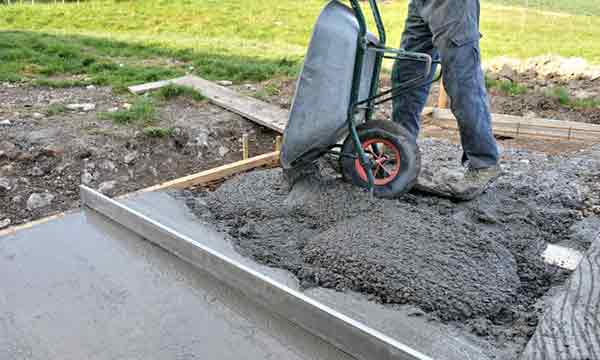
9. Concrete Slab
The concrete slab is one of the shed foundation options you can come across nowadays. You can utilize it for a home-built or ready-made shed, garage, or small house. Beginners may find it hard to build a concrete slab foundation. You can use this heavy load-supporting foundation as a permanent solution.
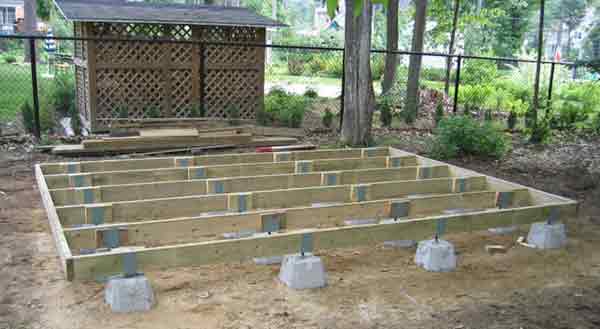
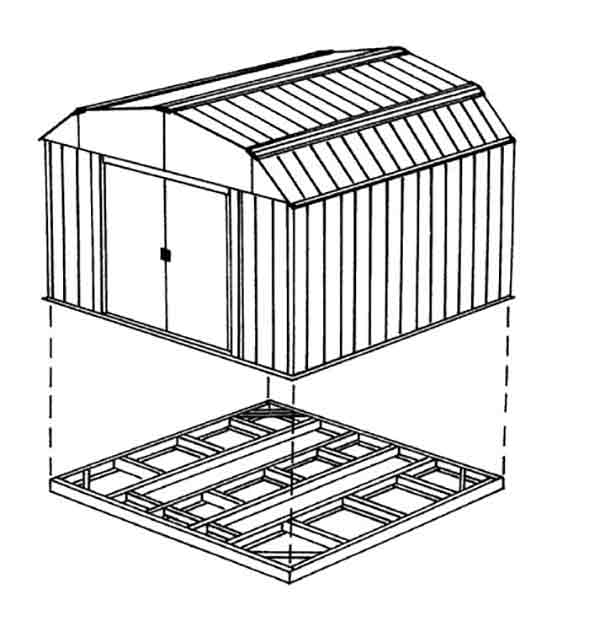
10. Post and Beams
These types of foundations work efficiently with small or large ready-made and homemade sheds. They are suitable for most soil conditions. The process of building this foundation could be slightly difficult for beginners.
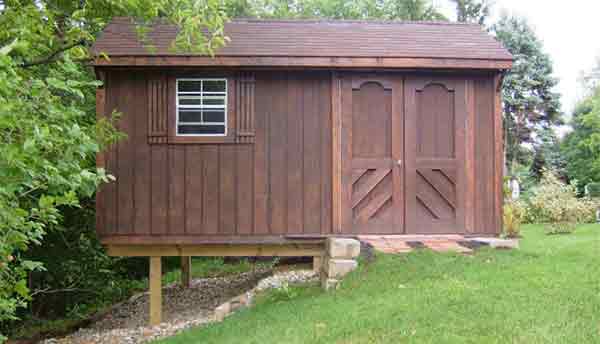
Image by StorageBuildingsUnlimited
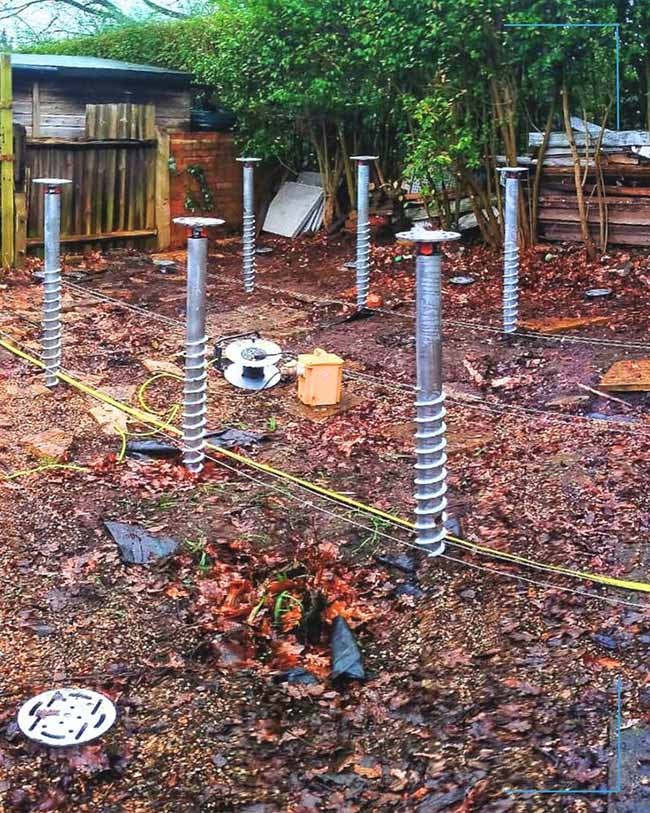
11. Screw Piles
Screw piles are an excellent choice for ready-made and homemade sheds. Further, you can use them on any soil type. These foundations provide a permanent level base. If there are frost-related issues in your area, screw piles are a reliable choice.

How to Build a Shed Foundation on Uneven Ground
Building a shed on sloped or bumpy ground isn’t always easy—but it’s definitely possible with a bit of planning and the right shed foundation ideas. This guide will walk you through smart and simple solutions for creating a solid, long-lasting shed base on uneven terrain.
1. Understand Your Ground Before You Start
How Steep Is the Slope?
The first thing to check is how much the ground drops from one side to the other. A small slope might only need minor leveling, while a steep grade could require stronger support like posts or concrete piers.
You can measure the slope with a string level or laser level stretched across stakes placed at each corner of your planned shed area.
What Type of Soil Are You Working With?
Different soil types behave differently:
-
Clay is hard to dig and can hold water—bad for shed stability.
-
Sandy soil drains better but may shift under heavy weight.
-
Rocky ground might need a different toolset or approach entirely.
Knowing your soil will help you choose the best shed foundation for your situation.
2. Plan Your Shed’s Layout and Use
Think About What You’ll Store
Heavy loads like power tools, machinery, or firewood require a strong base. If you’ll just store gardening tools, a lighter foundation may be fine. Pick your shed foundation options based on what you’ll actually use the shed for.
Choose the Right Spot for the Door
If your shed is placed on a slope, think carefully about where the door goes. You’ll either need to build a ramp on the high side or face the door downhill for easier access.
Also consider adding south-facing windows to bring in natural light—especially if you’re not wiring electricity to your shed.
3. Check for Permits and Rules
Before you begin digging or building, check with your local building department. You may need:
-
A building permit (especially if your shed is large).
-
To follow setback rules from property lines or fences.
-
HOA approval if you live in a community with restrictions.
4. Best Shed Foundation Ideas for Uneven Ground
Let’s go over several shed base ideas, from simple gravel pads to more complex structures for steep hillsides.

A. For Slight Slopes (Less than 8” Difference)
1. Gravel Pad Inside a Wooden Frame
-
Build a box using pressure-treated wood.
-
Remove the topsoil, lay down landscape fabric, and fill the box with crushed gravel.
-
Level and compact the gravel.
This is one of the most affordable and easiest DIY shed foundation options. It works well for light to medium loads.
2. Gravel Pad with a Retaining Wall
Instead of a full box, build a wall on the lower side to hold back the slope. This reduces how much gravel you need and keeps the foundation level. Use treated wood, spikes, or even concrete blocks to build the wall.
B. For Moderate to Steep Slopes
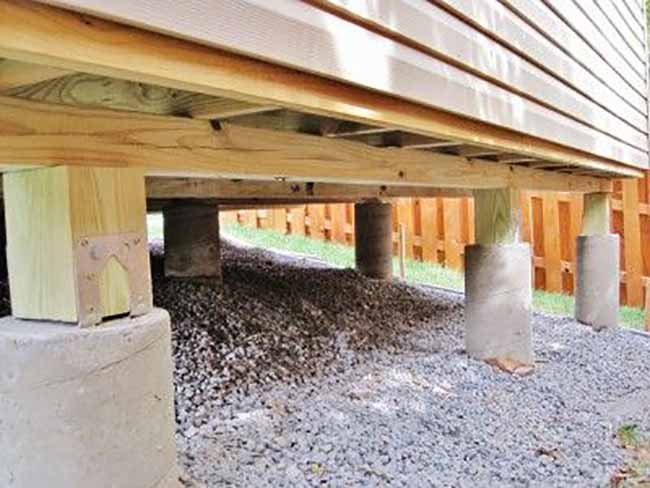
3. Post and Beam Foundation
-
Dig holes and pour concrete footings.
-
Set pressure-treated posts in the holes.
-
Attach horizontal beams on top to support the floor.
This option lifts your shed above the ground and allows airflow underneath. You can even enclose the space below for extra storage.
4. Concrete Pier Foundation
-
Use cardboard tubes (Sonotubes) filled with concrete.
-
Once the concrete hardens, place metal brackets on top to hold wooden beams.
Concrete piers are one of the best shed foundation types for stability and durability, especially in cold climates where frost heave is a concern.
5. Screw Piles
Screw piles are long metal posts that twist into the ground like a giant screw. These can be installed by a contractor or as a DIY kit (though DIY piles are usually smaller and less durable).
They’re ideal for areas where digging is hard—like clay—or where minimal ground disturbance is preferred.
5. Leveling Your Shed on a Slope
Whether you’re using gravel, piers, or posts, always make sure your structure is level. Use strings, levels, and stakes at each corner to keep everything aligned.
Tips:
-
Compact your gravel well to avoid shifting later.
-
Add cross-bracing between posts or beams for extra support.
-
Drainage is key—add pipes or trenches to redirect water away from the shed.
6. Shed Base Ideas for Every Situation
Here’s a quick overview to help you pick the right shed base for your landscape:
| Terrain | Recommended Base | Good For |
|---|---|---|
| Slight Slope | Gravel Pad in Box | Small garden sheds, tools |
| Moderate Slope | Gravel + Retaining Wall | Heavy loads, lawn equipment |
| Steep Slope | Concrete Piers or Post & Beam | Large sheds, tough soil |
| Rocky/Hard Soil | Screw Piles | Areas hard to dig in |
Conclusion: Build It Right the First Time
Setting up a shed on uneven ground may take a little more work, but it’s totally worth the effort. With proper planning, tools, and the right shed foundation options, your shed can last for years without shifting, sagging, or leaking.
Whether you’re looking for the best shed foundation for a small yard or creative shed base ideas for tricky terrain, the key is matching the method to your landscape—and doing it right the first time.