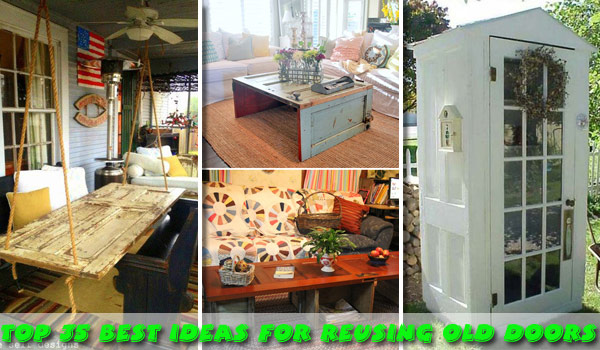
The Best 35 No-Money Ideas To Repurpose Old Doors
As we know, repurposing things has become the hottest trend in home decor these days. The greatest advantage of upcycling projects is that you can save a lot of money, showcase your creativity, and make the most of what to do with old doors—those old, useless items that have been lying around.
Repurposing old doors, reusing their materials, and finding innovative ways to give them new life is just a great idea. An old door might seem like it should be scrapped, but with some great redo ideas, it will get a new life and become an awesome home decor project. Below, you can find a ton of fabulous old door repurposing ideas we’ve collected for you; they may require a little effort, but they are worth every repurposed penny! Enjoy!
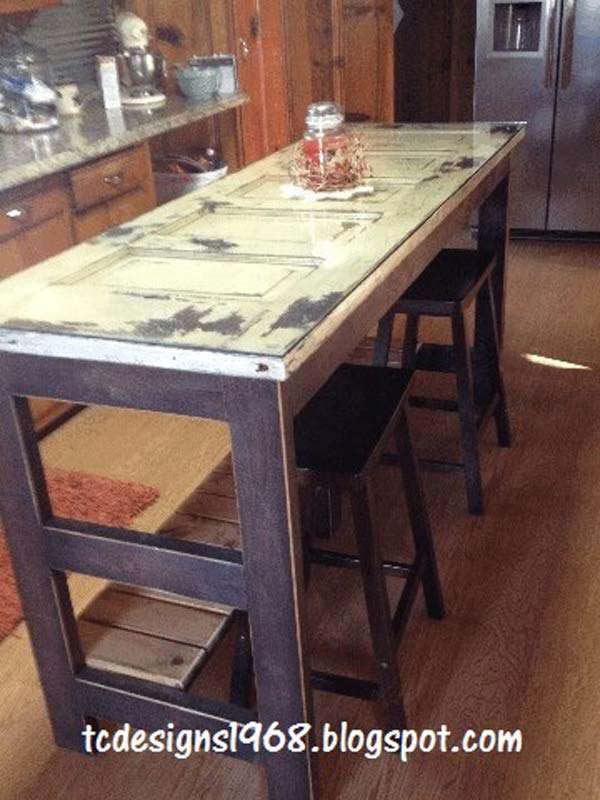
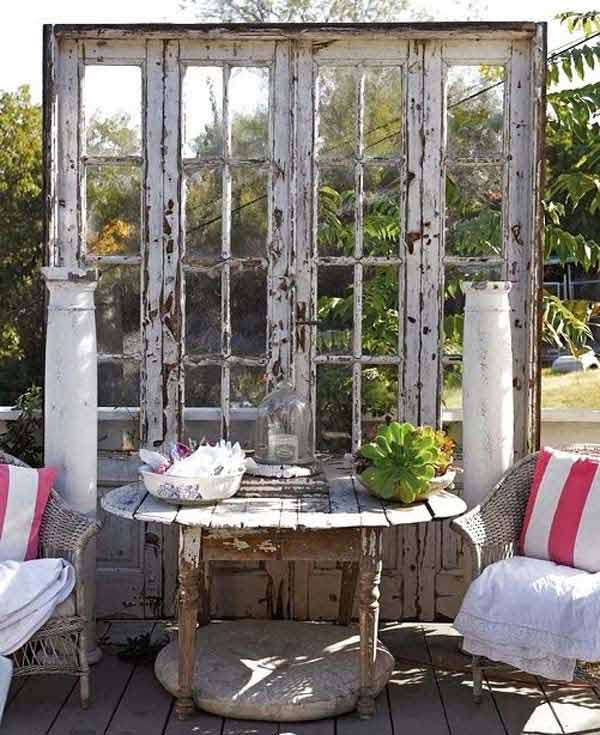
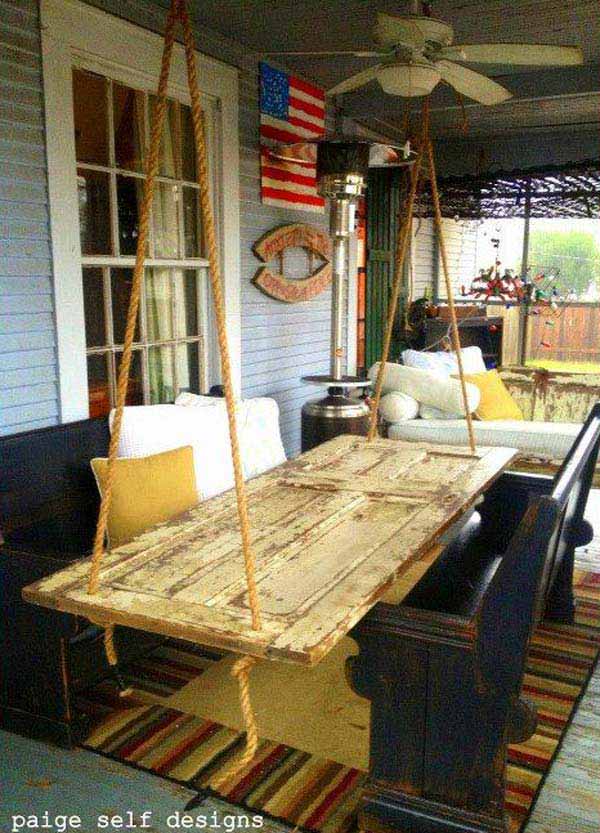
#1 Crafting a Charming Coffee Table Using a Vintage Door
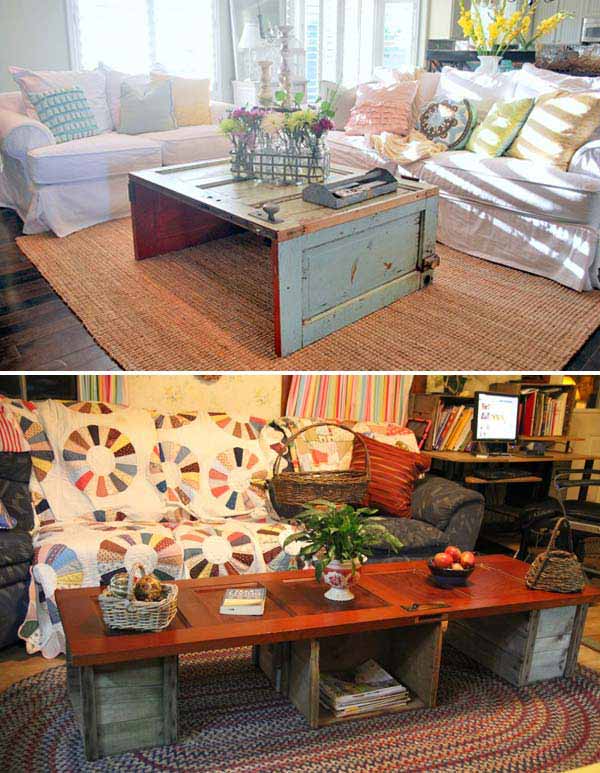
When you stumble upon an old crawl space door, seize the opportunity because we’ve got a fantastic recycling suggestion for you!
Thanks to its dimensions, it’s an ideal candidate for a rustic coffee table makeover.
For stability, you can repurpose some cabinet doors and affix them with hinges to the underside of the door.
Bottom Image Source
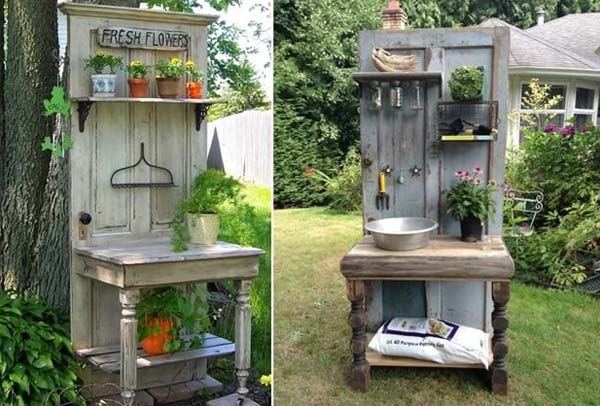
#2. Create a Distinctive Photo Gallery Using a Vintage Door
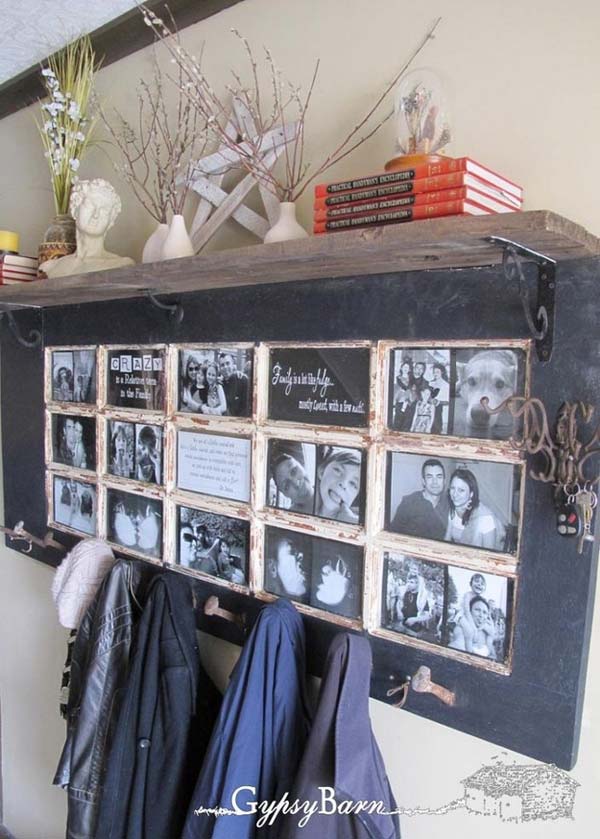
Take an old door, turn it sideways, and watch the magic unfold as it becomes a combination picture frame and coat rack that’s both playful and practical.
The door’s former glass panes now house your favorite pictures and inspiring quotes.
At the top, a handy shelf has been added for displaying even more photos or decorative items. On the side, you’ll find convenient key hooks, and at the bottom, practical coat hooks.
This is the perfect addition near your entryway, providing quick access to essentials as your family heads out the door.
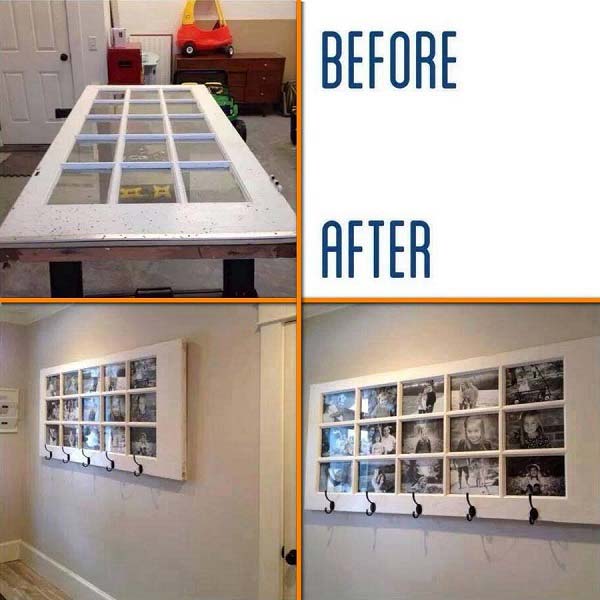
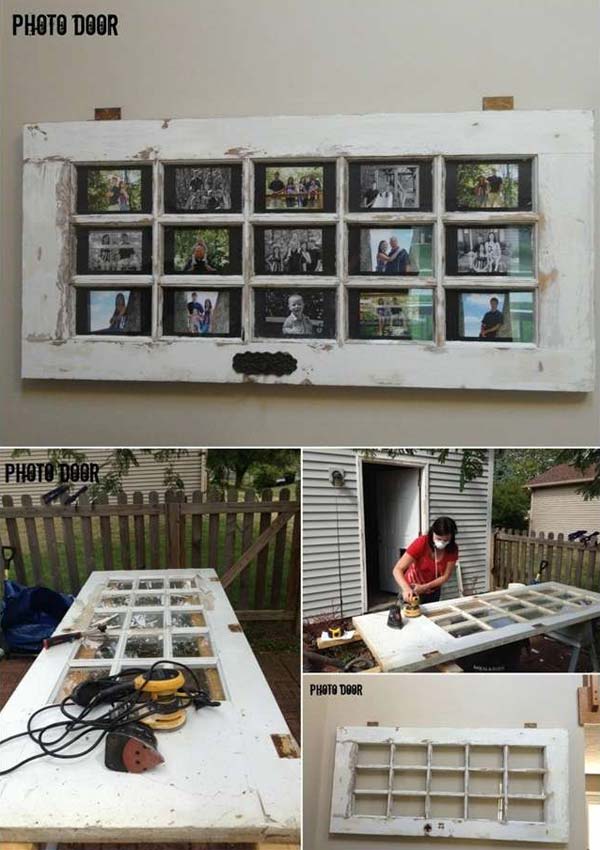
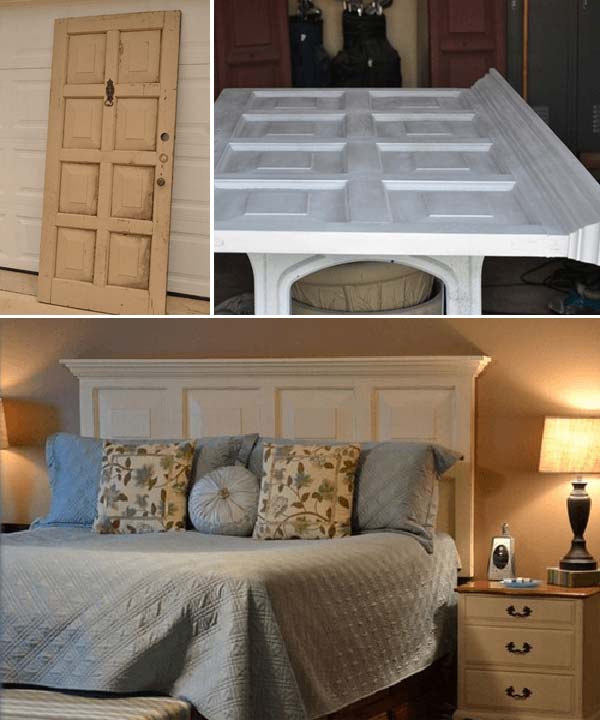
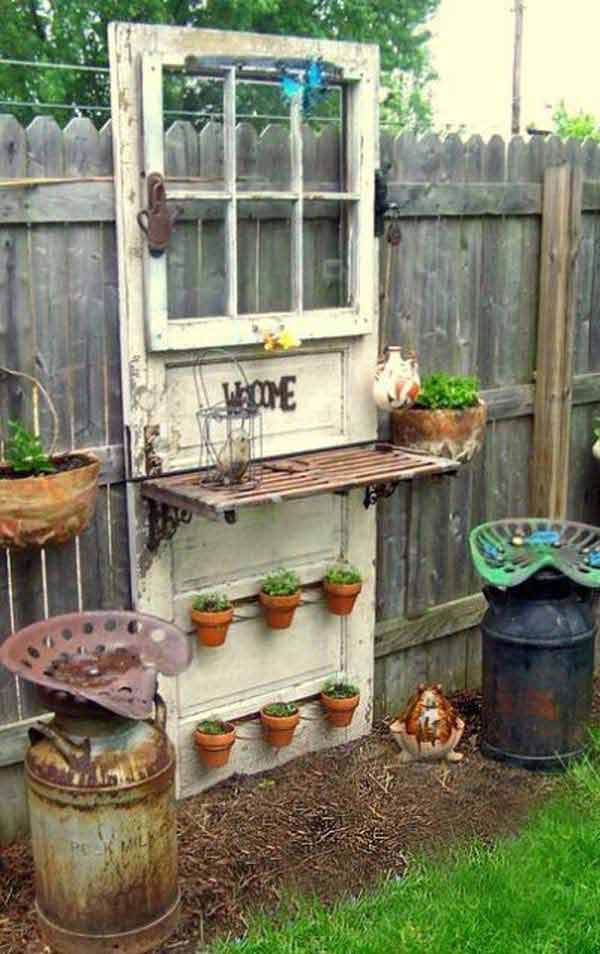
Transforming an old, multi-paneled door into a stunning photo display is a creative and budget-friendly way to showcase cherished memories. This DIY project repurposes a vintage door into a unique photo frame, adding character and a personal touch to any room.
DIY Photo Door Display
Materials Needed:
-
Old door with multiple glass panes (e.g., 15-pane door)
-
Sandpaper or electric sander
-
Paint scraper
-
Cleaning supplies (cloth, mild detergent)
-
Saw (if resizing the door)
-
Mounting hardware (screws, wall anchors, hinges)
-
Printed photographs
-
Photo mats (optional)
-
Double-sided tape or photo corners
Step-by-Step Instructions:
-
Find the Perfect Door: Search for a vintage door with multiple glass panes. Online marketplaces like Craigslist or local salvage yards are excellent places to find such doors. Ensure the door is structurally sound and the glass panes are intact.
-
Prepare the Door:
-
Clean: Remove any dirt, dust, or cobwebs using a damp cloth and mild detergent.
-
Sand: Use sandpaper or an electric sander to remove old paint and smooth the surface. Be cautious around the glass panes.
-
Scrape: For stubborn paint areas, gently use a paint scraper.
-
-
Resize if Necessary: Measure the space where the door will be displayed. If the door is too large, use a saw to trim it to the desired size. Ensure that any cuts are made carefully to maintain the door’s structural integrity.
-
Mount the Door: Decide on the orientation—vertical or horizontal—based on your wall space and aesthetic preference. Securely attach mounting hardware to the door and wall, ensuring it can support the door’s weight. Using hinges can add a decorative touch and make mounting easier.
-
Select and Prepare Photographs: Choose 15 of your favorite family photos to fit the glass panes. Mixing color and black-and-white images can add visual interest. Print the photos to match the size of the panes. Using photo mats can enhance the presentation and protect the photos.
-
Insert Photos: Carefully place each photo behind the glass pane, securing it with double-sided tape or photo corners. Ensure each photo is centered and straight. If using photo mats, position the photos within the mats before placing them behind the glass.
Display and Enjoy:
Once all photos are in place, step back and admire your personalized photo door display. This piece not only showcases treasured memories but also adds a rustic and artistic element to your home decor.
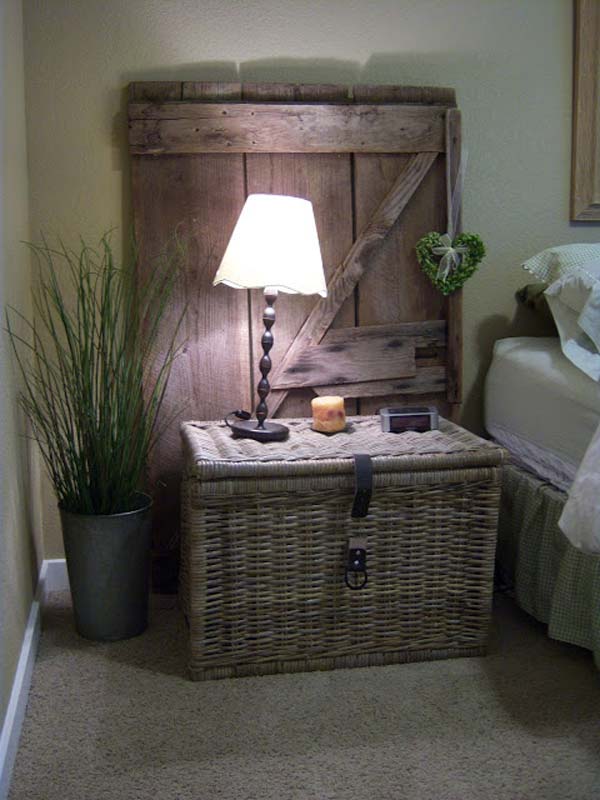
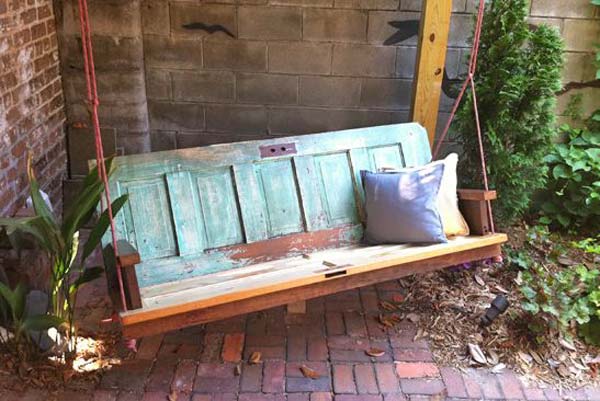
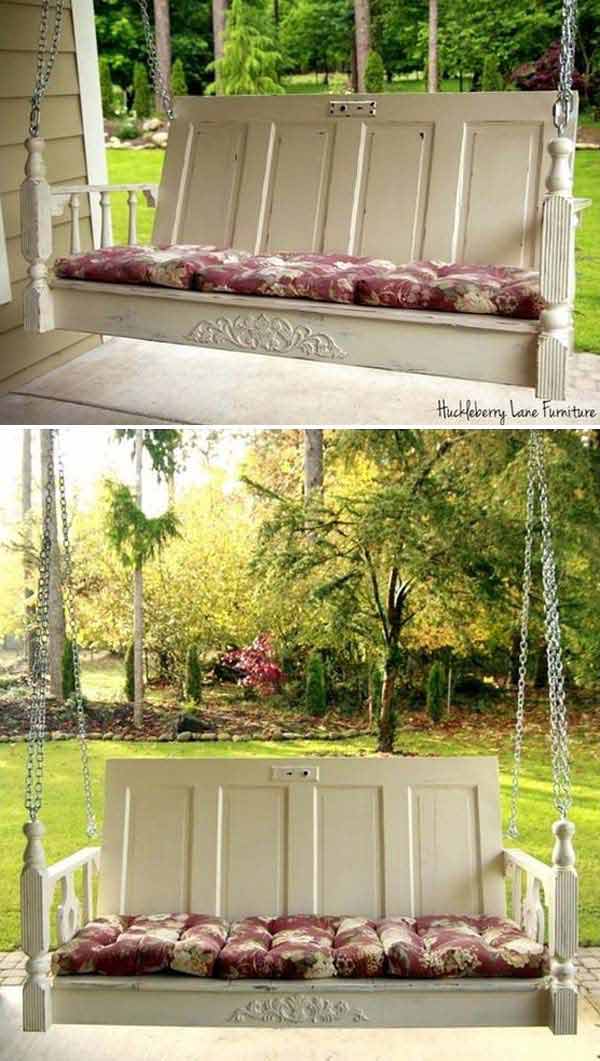
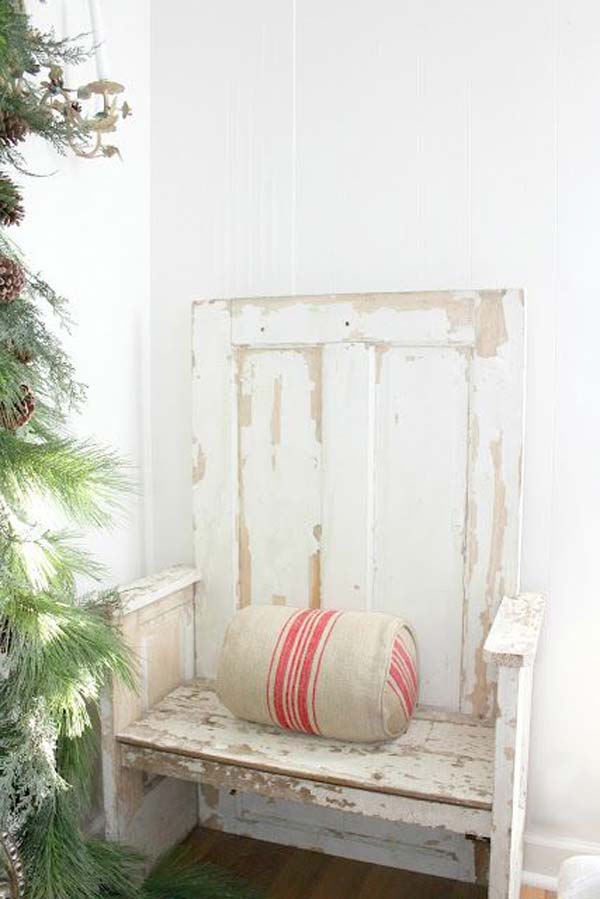
#3 Infuse Rustic Charm with a Distressed Door Bench

Crafted from a weathered old door, this wooden bench exudes rustic elegance. If your door isn’t naturally aged, you can experiment with various surface treatments to achieve the same effect. Enhance the comfort and farmhouse aesthetics by adorning it with a cushion made from burlap or a coffee bean sack pillow.
Becky from Beyond the Picket Fence transformed a salvaged half-door into a charming bench, aptly named the “A-DOOR-able Bench.” This creative project showcases how reclaimed materials can be repurposed into functional and aesthetically pleasing furniture.
The Simple Guide for This Door Bench:
-
Materials:
-
A half-door, cut lengthwise to form the bench sides.
-
A single panel from another old door for the bench back.
-
Three pieces of wood from an old schoolhouse for the seat, including two pieces of trim.
-
A board from a dismantled piano added beneath the front of the seat.
-
-
Construction Details:
-
Brackets were added inside the bench sides to support the seat.
-
An additional bracket was placed under the seat along the back, running lengthwise between the sides.
-
The finishes on all salvaged pieces were left as-is, with some sanding (while wearing a respirator mask due to potential lead paint) and a coat of Minwax Polyacrylic in a semi-gloss finish applied.
-
-
Aesthetic Touches:
-
The bench features weathered sides with remnants of white paint on the inside.
-
Sanding the back door panel revealed four layers of paint colors, adding to its rustic charm.
-
This bench exemplifies the beauty of upcycling and the potential of reclaimed materials in DIY projects.
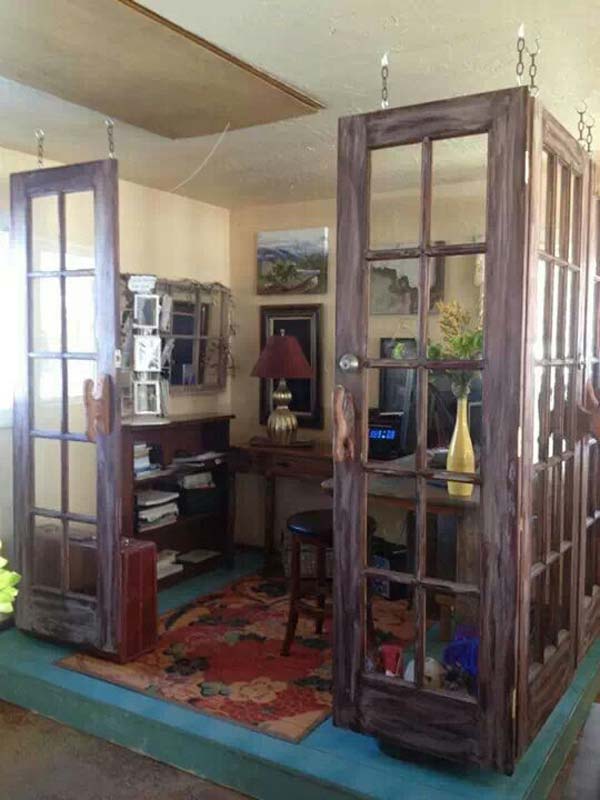
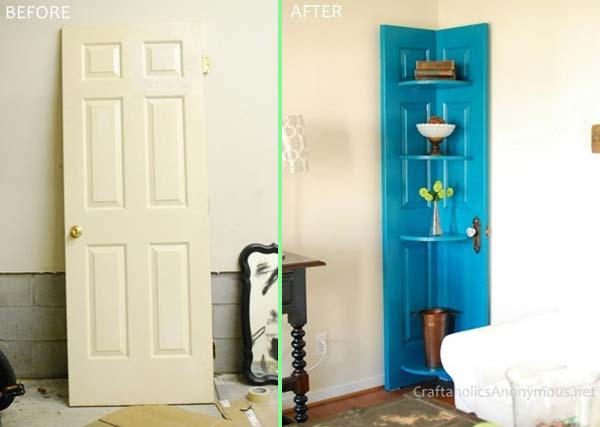
#4 Transformed Vintage Door into a Charming Ladder Bookcase
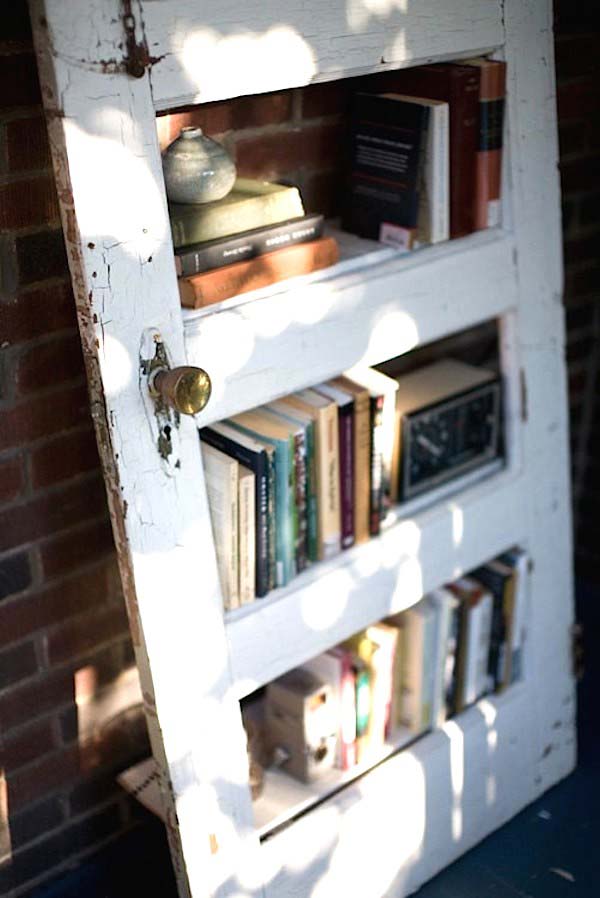
This abandoned door has undergone a fantastic transformation into a delightful corner bookshelf by introducing shelves where the glass panels used to be.
The door’s original hinges were preserved, and a distressed paint finish maintains its vintage appeal.
It’s a one-of-a-kind approach to infuse unexpected and creative farmhouse-style elements into your space.