The Top 15 Ceiling Texture Types for Easy Selection
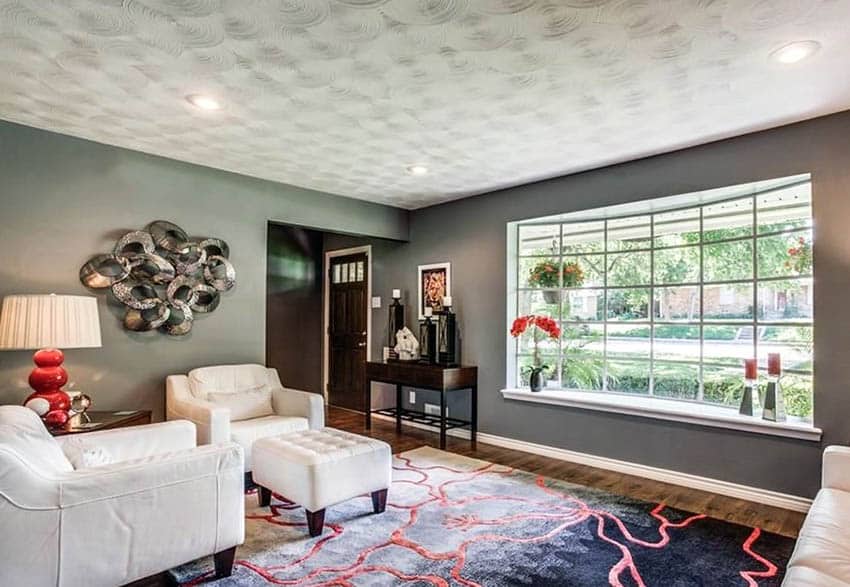
Discover the perfect ceiling texture for your home with our guide to the most popular options. When designing your rooms, it’s crucial to consider not only wall and ceiling paint colors but also the texture patterns that can create an interesting and captivating atmosphere. Dive into the variety of ceiling textures, materials, and tools needed, and explore their pros and cons.
What’s more, we provide instructions and videos for DIY textured effects, empowering you to create a unique look. Don’t overlook the importance of ceiling design—make a statement and enhance your space with the right texture choice.
What is a Ceiling Texture or Textured Ceiling?
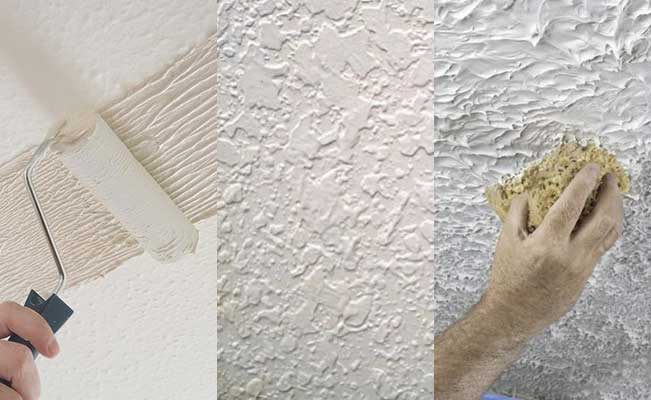
A ceiling texture, also known as a textured ceiling or “popcorn ceiling,” refers to a style of drywall finish that differs from the conventional smooth ceilings that are typically painted.
Instead of a smooth surface, a textured ceiling incorporates irregular or bumpy patterns achieved through the application of paint or spray.
This type of ceiling finish was prevalent in the 70s but declined in popularity due to asbestos concerns. However, it has made a comeback in modern homebuilding with the introduction of safer, cheaper, and cleaner materials.
Pros and Cons of Ceiling Texture
Ceiling textures offer various advantages and disadvantages to consider. They are renowned for their ability to conceal imperfections and are generally easier and more affordable to create, often requiring two layers of paint instead of three.
Additionally, textured ceilings can help to dampen noise. On the other hand, they pose challenges when it comes to cleaning and repairing compared to smooth ceilings. They also tend to reflect less light into the room and may not be the most suitable choice for areas exposed to moisture, such as bathrooms and kitchens.
Overall, the preference between textured and smooth ceilings is subjective and depends on personal aesthetics, as well as an individual’s evaluation of the specific pros and cons associated with each type, alongside the unique features of the room.
Ceiling Textures and How to Choose One?
************************************************************************
You May Also Like: 11 Easy Tricks to Find Metal and Wood Studs Behind Plaster Walls

1. Knockdown Ceiling Texture
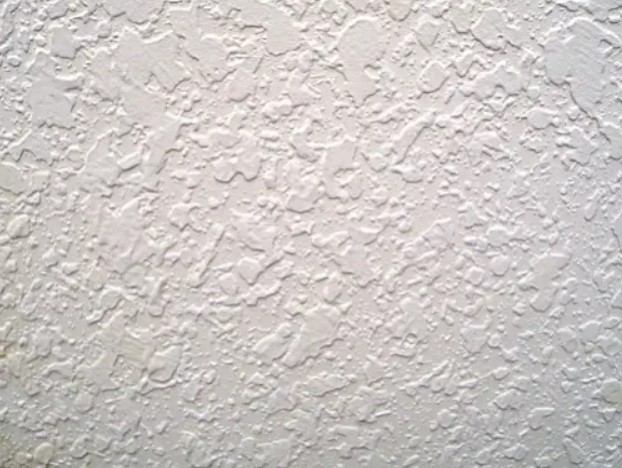
What is knockdown ceiling texture?
Knockdown ceiling texture creates a rustic pattern similar to stucco, concealing imperfections and adding depth to a room. With some experience and the right tools like an air compressor and hopper gun, you can easily handle this project.
Creating a knockdown texture is a simple process that adds warmth, depth, and character to your living room or bedroom. Here’s a quick and easy tutorial:
Start by preparing the surface. Lay a plaster foundation on the ceiling or walls.
Take a soft brush or sponge and gently tap all over the surface. This will create uneven areas with deeper “craters” and higher edges.
To flatten the surface and remove the edges, use a knockdown tool. You can also use a knife, scraper, or trowel, but be careful not to press too hard. The goal is to keep the “valleys” in between.
Continue working the texture until you achieve the desired look. Remember to maintain a smooth overall surface while keeping the textured areas intact.
here’s tutorial video:
2. Stippled Ceiling Texture
What is stippled ceiling texture?
Stippled ceiling texture is a popular technique that involves creating a textured surface with small dots or specks. It is achieved by applying a stippling brush or a roller with a stippling pattern to create the desired texture. The result is a unique and textured look that can enhance the overall aesthetics of a room.
How to Create Stipple Ceiling Texture:
Prepare the Materials: Make sure you have the necessary tools and materials, including a stomp brush and premixed joint compound.
Apply the Mixture: Use a roller or paint gun to apply the premixed joint compound onto the ceiling surface.
Stipple the Ceiling: Take the stomp brush, which has long bristles, and press it against the ceiling. Lift it back and move it across the ceiling to create irregular shapes and textures. Continue this process until the entire ceiling is covered.
Press Larger Chunks: If there are larger chunks that don’t look aesthetically pleasing, use a knockdown blade or a similar tool to press them down. Ensure you press the entire surface for a uniform appearance.
Clean up: Stipple ceiling texture can be messy, so be prepared for some cleanup afterwards. Remove any excess joint compound and clean your tools properly.
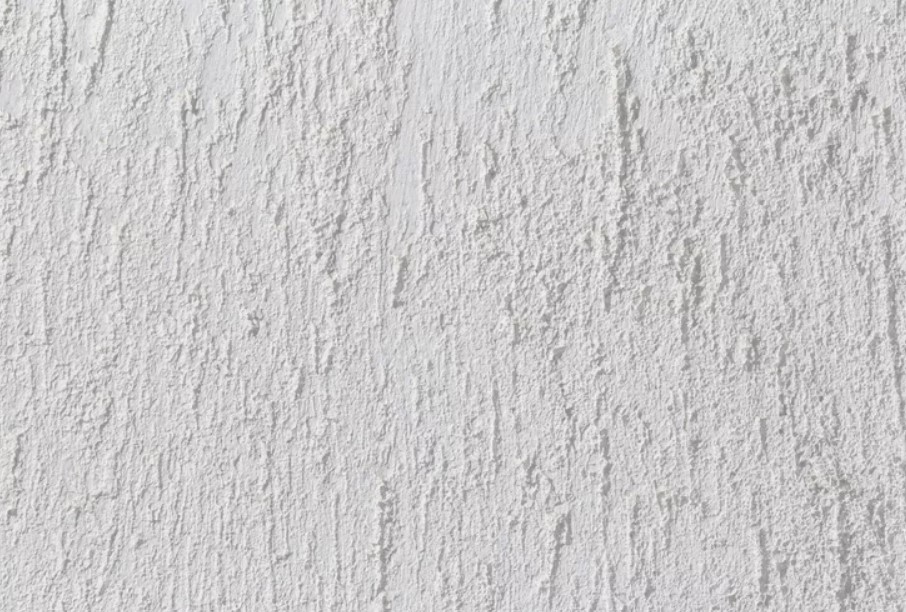
3. Skip Trowel ceiling texture
What is skip trowel ceiling texture?
Skip trowel ceiling texture is a textured finish applied to ceilings. It involves using a trowel to spread a thin layer of joint compound, then adding texture with techniques like stippling or swirling. It offers various looks, from subtle to dramatic.
Pros and cons of skip trowel ceiling texture:
Pros:
Adds visual interest and depth to a room.
Conceals minor imperfections on the ceiling surface.
Can complement various interior design styles.
Cons:
Difficult to repair if damaged.
Can trap dust and dirt, requiring regular cleaning.
Here’s a simplified process for creating a skip trowel ceiling texture:
Creating a skip trowel ceiling texture is a manageable task that requires a trowel and a few materials. Hold the trowel at an angle against the wall and move it gently in random patterns to achieve an uneven texture. The level of texture can be adjusted by varying the ratio of rough and smooth areas. Different styles, like Old World or Spanish, offer distinct looks and ambiance. Use coarse sand and all-purpose joint compound for the skip trowel texture. It’s important to note that skip trowel texture is different from knockdown texture, with more spacing and spread.
Tutorial video:
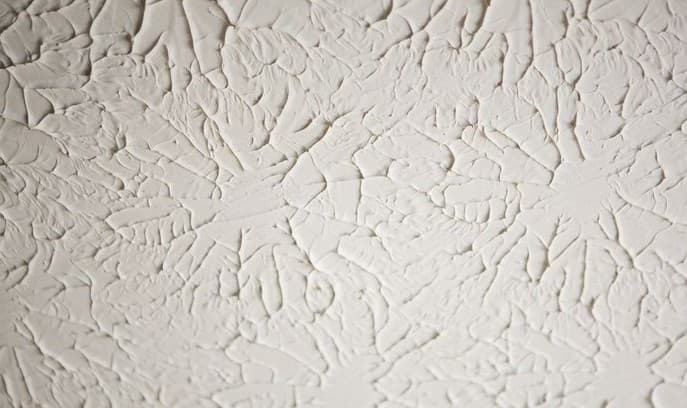
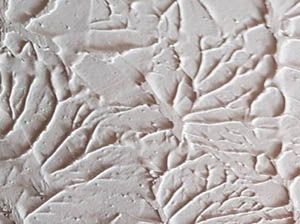
4. Lace ceiling texture
What is Lace ceiling texture? Pros and cons of Lace ceiling texture?
Lace ceiling texture is a decorative finish resembling delicate lace patterns. It’s applied using joint compound or plaster with a texture brush or sprayer.
Pros: Lace ceiling texture hides imperfections, and can be customized with different colors for a personalized touch.
Cons: Applying lace ceiling texture requires skill and precision. Repairing or removing lace texture can also be challenging.
Lace texture is a beautiful and artistic option for ceilings that requires more time and effort. The process is similar to skip trowel texture, but with an additional step.
After applying the first layer of paint, let it dry before adding a second layer in a different color. Then use a trowel to create texture on the second layer.
Choose complementary colors to achieve the desired effect. It’s important to wait for the first layer to dry completely. The tools and materials needed are the same as for skip trowel texture.
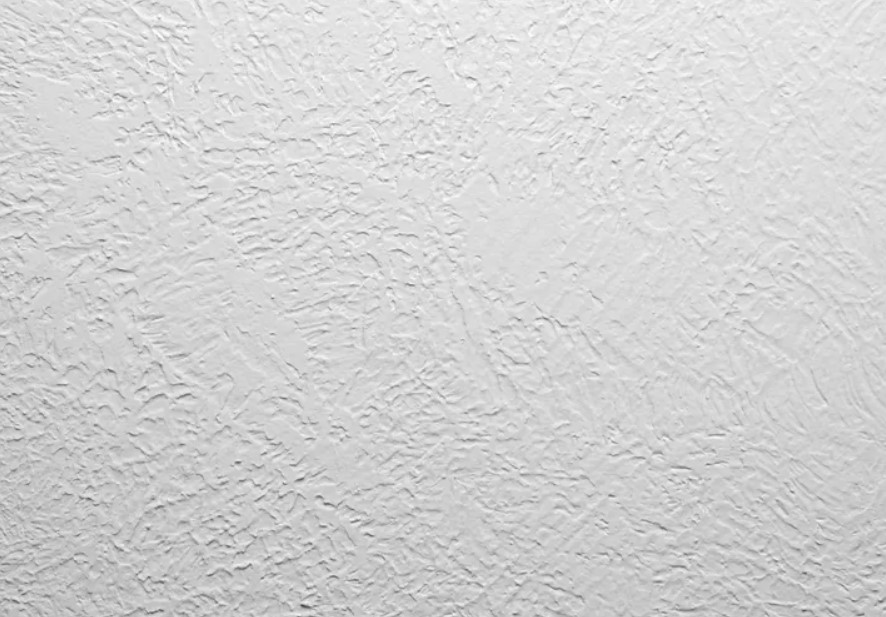
5. Stomp Ceiling Texture
What is stomp ceiling texture?
Stomp ceiling texture is a technique used to create texture on ceilings. It starts by applying a thin layer of joint compound to the ceiling. Then, a stomping tool is used to create the desired texture by pressing or stomping on the compound.
Pros and cons of stomp ceiling texture:
Considering adding texture to your ceilings? Stomp ceiling texture is a great choice. Using a special brush or roller, it creates a stippled effect that adds visual interest and hides imperfections. However, there are a few things to keep in mind.
On the positive side, stomp ceiling texture is excellent for covering up flaws and creating an appealing look. Yet, if it gets damaged, repairs can be tricky.
The stippled effect makes touch-ups stand out, and blending can be difficult. Additionally, if you ever want to remove the texture, it can be a challenging and time-consuming task.
Applying Stomp Textures to Ceilings:
6. Popcorn Ceiling Texture
What is Popcorn Ceiling Texture?
Popcorn ceiling texture is a classic and well-known textured finish that has been used for a long time. Although it may not be considered trendy nowadays, it has significant advantages, such as its excellent soundproofing properties.
To create the popcorn texture, the ceiling is painted with a thick popcorn paint. You can use a roller to apply the texture directly or use a paintbrush for a more manual approach. It’s important to avoid creating shapes or patterns as that can result in an uneven appearance.
The popcorn texture resembles small popcorn pieces or even cottage cheese in some cases. It is the highest and deepest texture, which means it can be fragile and easily damaged if pressed against.
While the popcorn style has a retro charm and a unique appeal, it can also collect dust over time and may feel outdated to some.
The tools and materials needed for popcorn texture are the same as those used for knockdown texture.
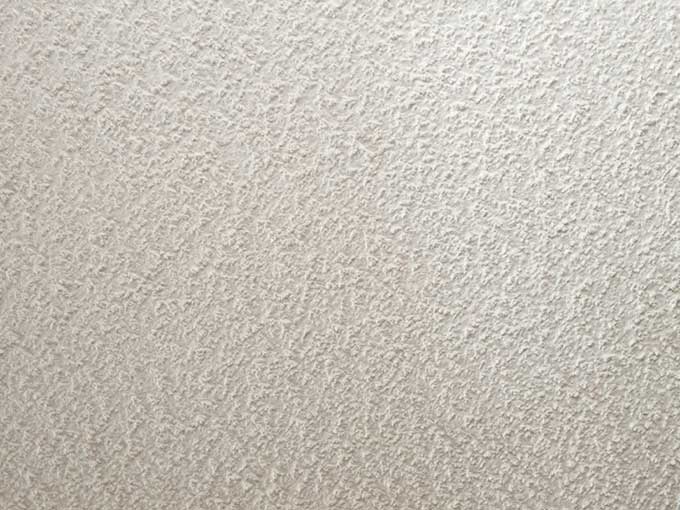
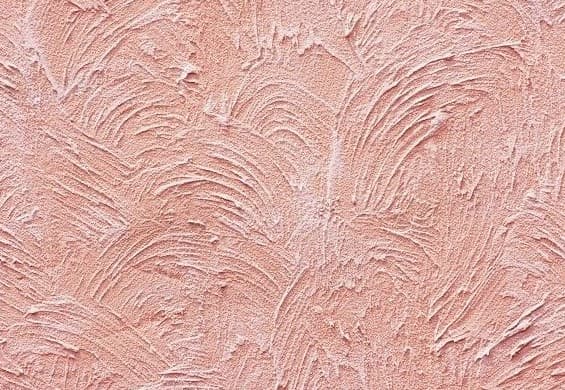
7. Orange Peel Ceiling Texture
Orange peel texture is a spray-on texturizer that creates uniform ovals on the ceiling. To create this texture, you will need a spray gun and orange peel spray texture. Spray it in short bursts from a distance of half a meter or more, then let it dry before priming and painting. It adds character and goes well with natural or softer colors. However, cleaning can be challenging due to the small spaces between the ovals. Avoid using it in kitchens or bathrooms.
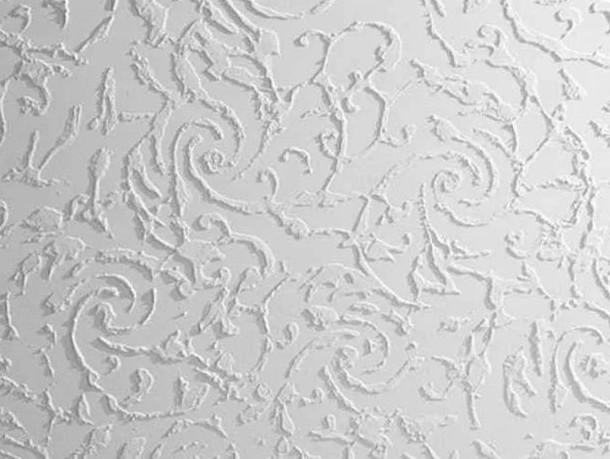
8. Swirl ceiling texture
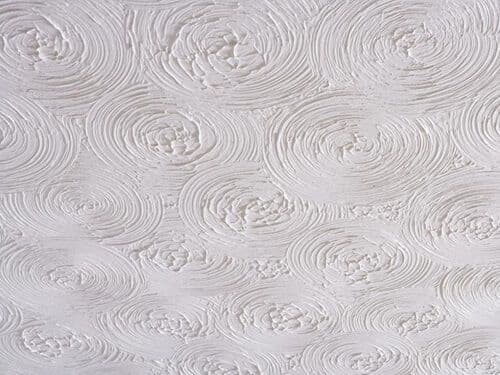
What’s Swirl Ceiling Texture?
Swirl ceiling texture is a decorative paint finish that adds a three-dimensional effect to ceilings and walls. It is created using a mixture of joint compound and latex paint, which can be applied with a brush, roller, or sprayer.
How to Create Swirl Ceiling Texture:
To achieve a swirl ceiling texture, you’ll need a brush or a sponge. For a rougher texture, use a brush, and for a smoother texture, use a sponge.
With your chosen tool, apply the texture in separate, evenly sized circles all over the surface of the ceiling.
The swirl style requires precision and craftsmanship, resulting in a visually pleasing ceiling texture. Tools and materials needed for creating a swirl ceiling texture are the same as those used for skip trowel technique.
9. Tree Bark Ceiling Texture
Tree bark ceiling texture offers a subtle and natural aesthetic that complements wooden decor.
It mimics the appearance of real tree bark and can even be painted to enhance the resemblance.
Choosing this texture for your home is a great way to conceal imperfections while adding a pleasing design element to the ceiling.
However, it’s important to note that, like other ceiling textures, maintaining cleanliness can be challenging.
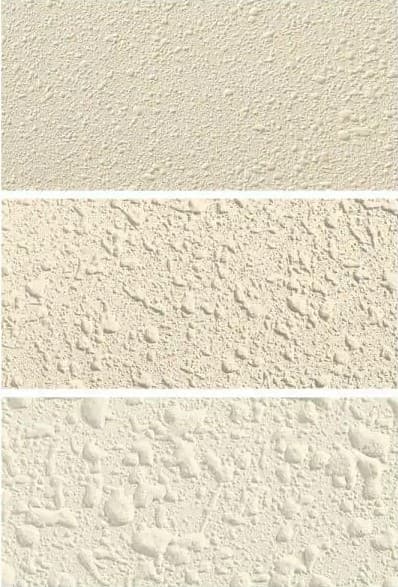
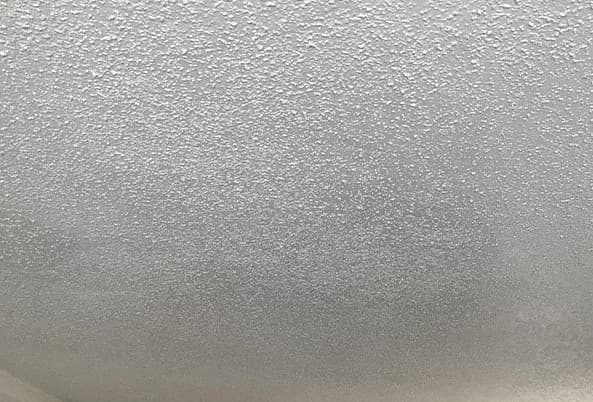
10. Spray Sand Ceiling Texture
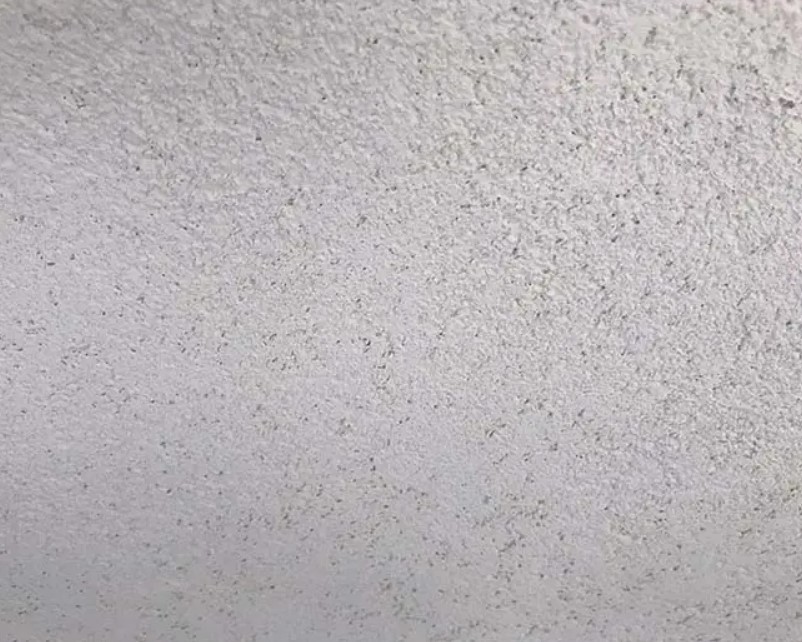
What is spray sand ceiling texture?
Spray sand ceiling texture is a type of textured paint that can bring depth and appeal to your ceilings. It contains sand particles, giving it a slightly grainy texture that catches and reflects light in a pleasing way.
How to create spray sand ceiling texture?
To create a spray sand ceiling texture, use a spray or a spraying tool like a hopper gun.
Cover the entire surface, paying attention to corners and spaces.
Spray sand texture consists of smaller ovals, giving it a less smooth appearance.
It shares the advantages and disadvantages of Orange peel texture. Tools and materials needed are the same as for Orange peel.
11. Crows Foot Ceiling Texture
Crows Foot ceiling texture creates a distinctive pattern on your ceiling that resembles the footprints of a walking bird. This textured finish is achieved through a two-person process using a stipple brush.
One person applies mud to different sections of the ceiling, while the other uses the stipple brush to create the desired pattern before the mud dries.
Although it can get a little messy, installing a Crows Foot texture is relatively easy and doesn’t require excessive effort.
Just remember to protect the surrounding area with plastic to contain any potential mess.
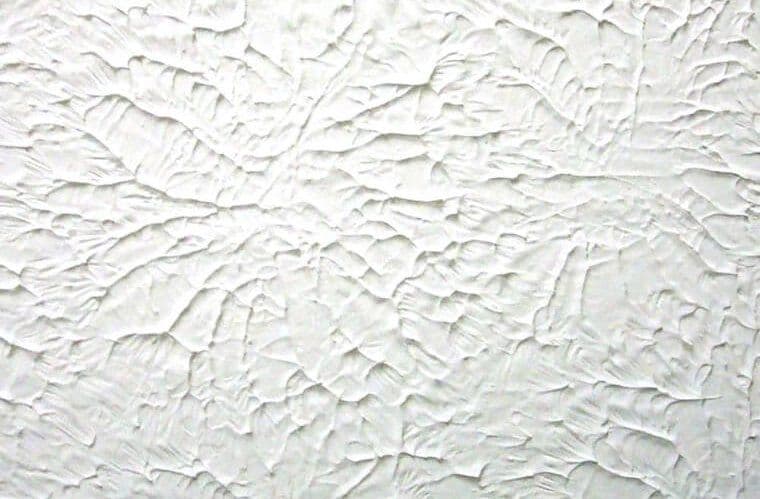
12. Slap Brush Ceiling Texture
What’s slap brush ceiling texture?
Slap brush ceiling texture is a popular choice for those seeking a distinctive pattern consisting of thin lines on their ceilings.
With just a few tools like a roller, slap brush, and drywall compound, you can easily create this unique texture without the need for professional assistance.
How to create slap brush ceiling texture?
To begin, mix the drywall compound with water until it reaches a paint-like consistency.
Using a paint roller, apply the compound to the ceiling evenly. Next, load the slap brush with compound and start gently slapping the ceiling, creating random lines and patterns as you go.
The result is a visually appealing texture that adds depth and instantly catches the eye, setting it apart from the smooth walls in the room.
Not only does it enhance the overall aesthetic, but it also allows you to achieve a striking visual display at an affordable cost.
15. Skim Coat Ceiling Texture
What is skim coat ceiling texture?
Skim coat ceiling texture is a textured finish used on ceilings and walls. It involves applying a thin layer of joint compound, also called “mud,” and using various tools to create textures.
Pros of skim coat ceiling texture:
Enhances the appearance of your ceiling and makes it easier to clean.
Cons of skim coat ceiling texture:
Applying it evenly can be challenging.
Insufficient pressure while rolling may result in an uneven finish.
Repairs can be more difficult if the texture gets damaged.
(a) HOW TO REPAIR TEXTURED CEILINGS
Not all water damage calls for extensive ceiling repair. If your textured ceiling isn’t flaking, falling, or showing signs of mold, you might be able to address stains with an aerosol sealer. This product effectively conceals discoloration from smoke, water stains, and oils.
Once the sealer has dried, paint over the affected area with ceiling paint. Matching the previous color can be challenging, so you may need to repaint the entire ceiling for a uniform appearance.
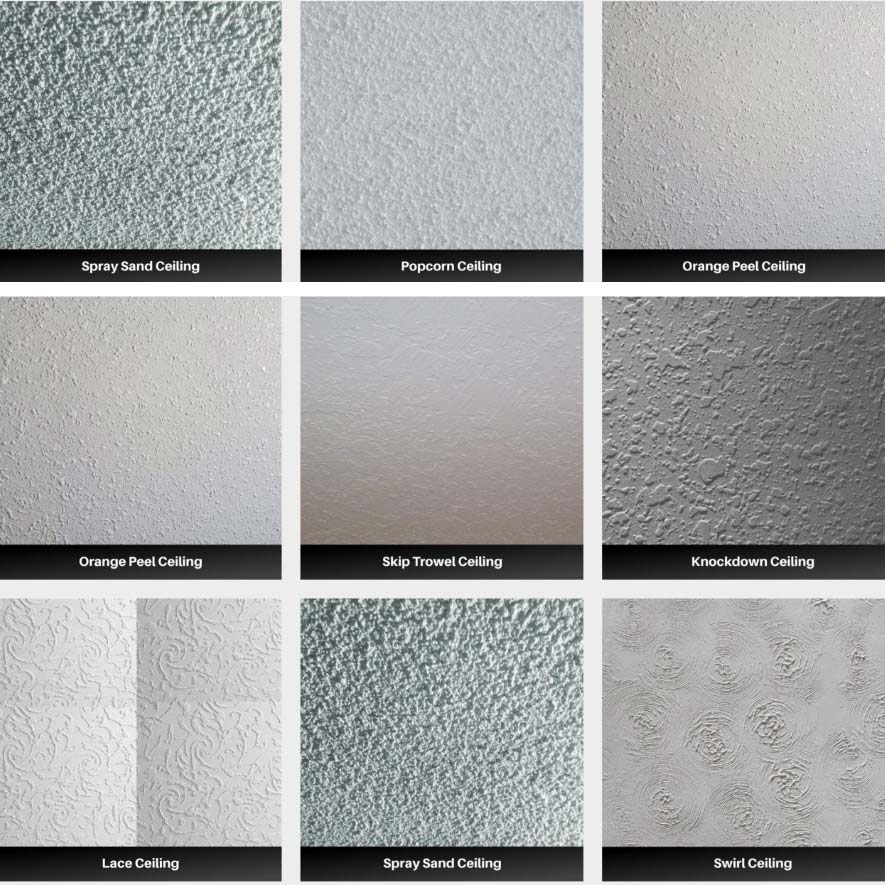
(b) CEILING TEXTURE TYPES
Repairing damage to a textured ceiling requires understanding the specific texture type present. Here are several common types:
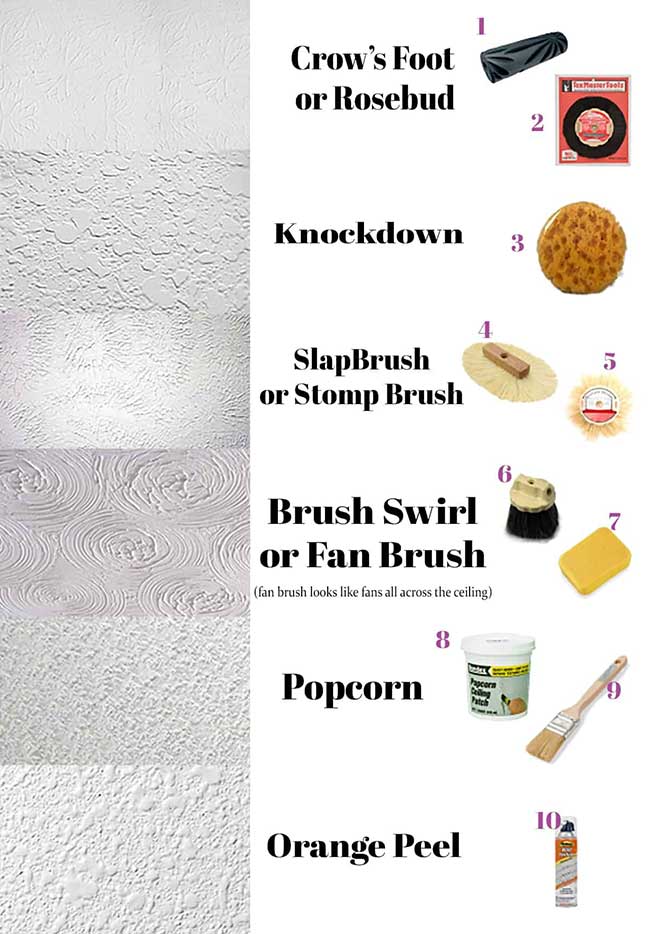
– Knockdown texture
– Orange peel texture
– Crow’s foot texture
– Popcorn texture
– Swirl texture
– Slap brush texture
– Skip trowel texture
Each texture type requires a unique approach to repair and replicate, ensuring a seamless blend with the existing ceiling surface
(c) STEP-BY-STEP INSTRUCTIONS
1. SOAK CEILING TEXTURE BRUSH
Except for orange peel and popcorn ceilings, other textures typically involve using joint compound and specific brushes to create patterns. To prepare the brush, soak it in warm water for at least an hour, or overnight. This softens the bristles, ensuring the right texture application.
2. PREPARE THE SURFACE AND APPLY JOINT COMPOUND
Begin by removing any loose texture from the damaged area and patching holes. Then apply the joint compound.
– Mix the joint compound thoroughly using a paddle and drill or a paint stick to remove bubbles.
– Practice applying the texture on spare board or drywall until you achieve the desired consistency.
– Apply the joint compound generously across the damaged area with a putty knife, aiming for a smooth finish that blends with the existing texture.
– Use a texture tool to replicate the pattern, ensuring it matches the surrounding texture.
– For knockdown ceilings, use a large putty scraper to flatten the texture slightly, waiting a few minutes before knocking it down further.
3. PAINT
Once satisfied with the texture pattern, allow it to dry overnight or longer before applying paint for a seamless finish.
FAQs:
Are Ceiling Textures a Thing of the Past?
Ceiling textures may not be a new trend, but that doesn’t automatically make them outdated. With so many different styles available, it’s impossible to say that textures have completely fallen out of favor.
That being said, certain textures have lost their appeal over time. Take popcorn ceilings, for example. Popular from the 1950s to the 1980s, they’re now considered old-fashioned by many homeowners who seek modern alternatives.
While some textured finishes are still widely used in home construction, popcorn ceilings are generally seen as a thing of the past.
In rooms with higher ceilings, textured designs can add a touch of elegance and a sense of grandeur. For smaller spaces, a more subtle approach is often better, preventing the room from feeling too busy or cramped. The key is balance—textures can either enhance or overwhelm a space depending on the size and style.
Can you make a textured ceiling using only paint?
Absolutely! Making your ceiling look cool is super easy. All you need is a special paint roller or brush to create some neat textures.
Imagine adding cool patterns and designs to your ceiling – it’s like giving it a little makeover! If you try the crowfoot method, the textures might become even more awesome, depending on the type of paint you pick.
So, with just a brush, you can totally transform your ceilings and make them stand out. Pick your favorite paint, grab a brush, and let your creativity fly to make your ceilings the coolest in town!
How Do You Match an Existing Texture to the Ceiling?
Matching a ceiling texture to what’s already in place starts with understanding the original texture’s application and technique. Once you’ve identified how it was applied, it’s a good idea to practice on a small, discreet area to ensure you’re getting the hang of it. For intricate patterns, seeking professional help can save you time and frustration.
The most challenging aspect is color matching. After all, you’re blending fresh material with ceiling textures that have faded over time. The key here is paint—and plenty of trial and error. There’s no magic trick, just careful experimentation until you get it right.
One helpful tip: If your texture doesn’t turn out as planned, don’t panic. You can always correct it by gently wiping it off with a damp sponge and trying again.
For a truly seamless look, you might consider matching the wall texture with the ceiling. If you’re working with a room that has lower ceilings, opt for a more subtle design to avoid overwhelming the space.
Keep in mind that deeply grooved textures can be harder to maintain, especially in high-traffic areas like kitchens. They tend to collect dust, grease, and debris, requiring extra care to keep them looking fresh.