15 Cool DIY Fabric Storage Bins and Organizers
To boost storage you can make DIY fabric storage bins and organizers. They will not only be practical but will look lovely thanks to their rich patterns and colors. Think about how cool these should be! You can create many types of storage bins by sewing fabrics and use them to store clothes, toys, towels and basically pretty much anything else.
In order to make fabric bins, you may need the following tools and materials:
- Fabric
Coordinating lining fabric
Cardboard
Needle & Thread
Fabric marker
Box cutter
Fabric Measuring Tape
Rotary cutter
Scissors
Cutting mat
Hot glue gun
Iron and ironing board
Here’s a video tutorial on making your own DIY Fabric Storage Bin:
The pro of DIY fabric storage bins is that you can give each one a different design including shape, pattern and size, or you can use different types of fabric for each piece to create a diverse set. All you have to do is to follow your design, cut the fabric, then combine the pieces together.
Each of the following projects all has detailed tutorial link. Visit them and check out the list of supplies needed and then start following the instructions:
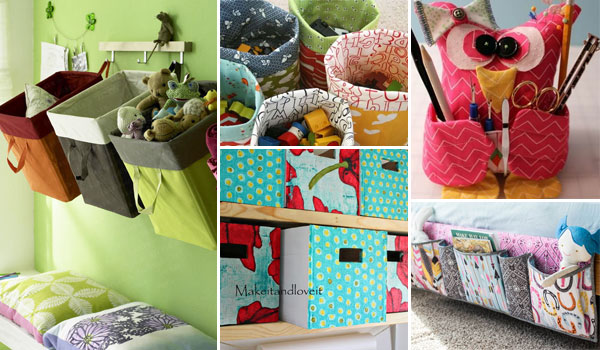
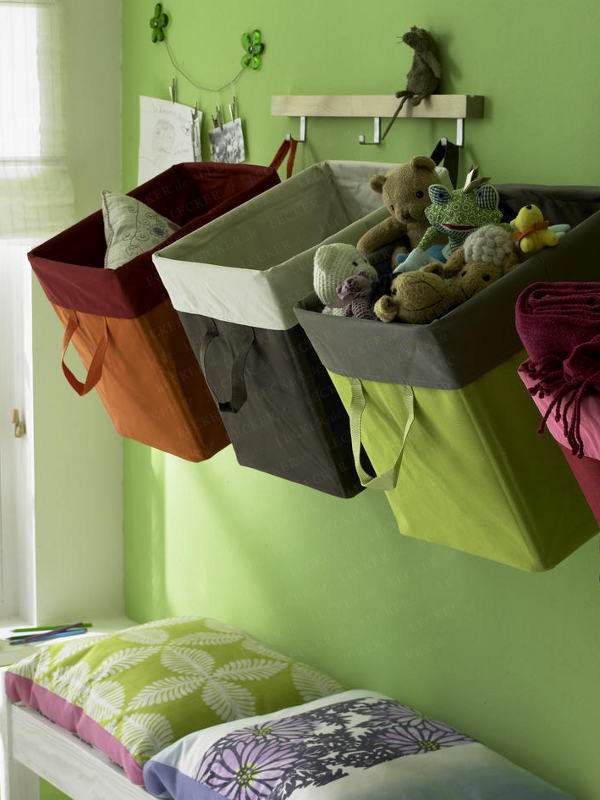
15. Hanging Storage Baskets for Storing Kid’s Toys | Tutorial: u-createcrafts.com
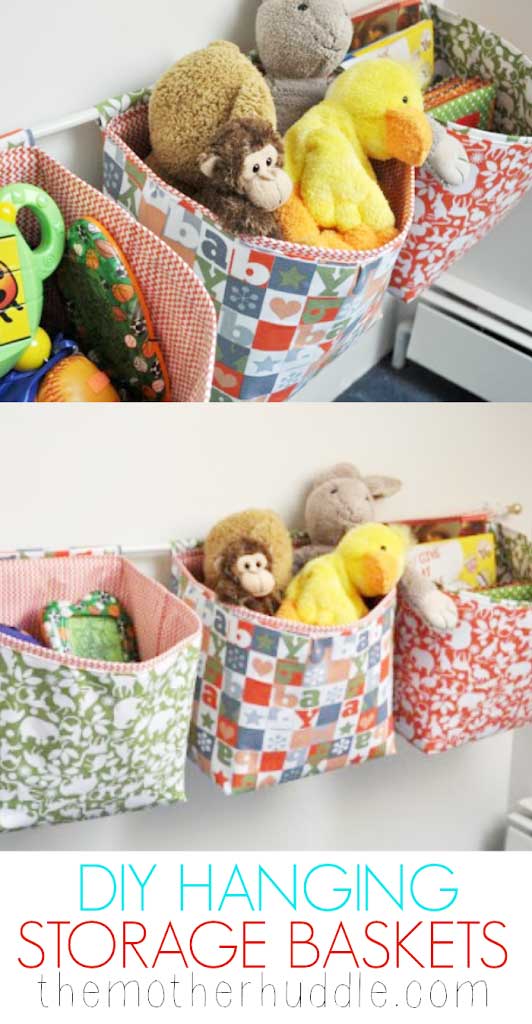
Tidy up your kid’s playroom or craft area with this smart hanging storage idea.
All you need is a simple curtain rod and homemade fabric baskets. They’ll convert an empty wall into an attractive, practical storage spot.
You can make the baskets small for threads and buttons or large for toys, books, and clothes. It’s an easy and adaptable organization solution!
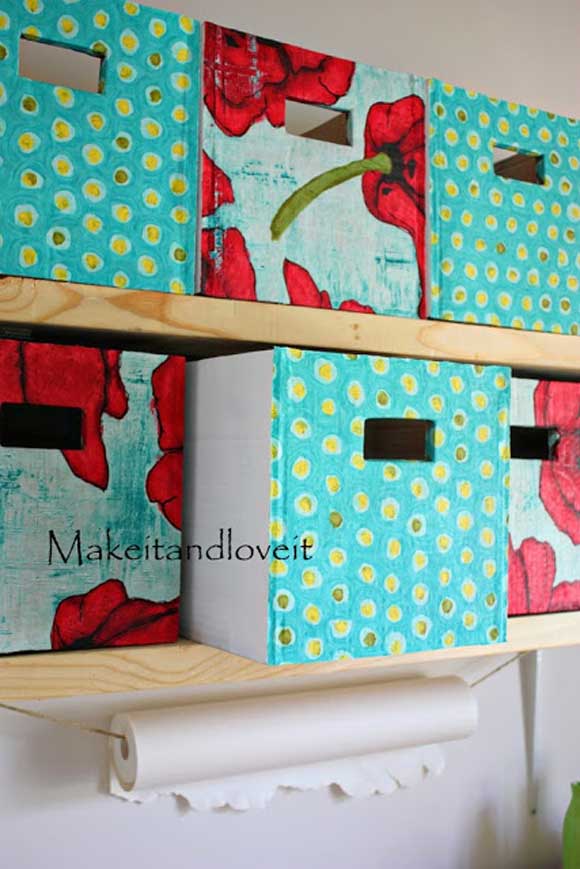
14. Fabric Storage Basket with Handles | Tutorial: makeit-loveit.com
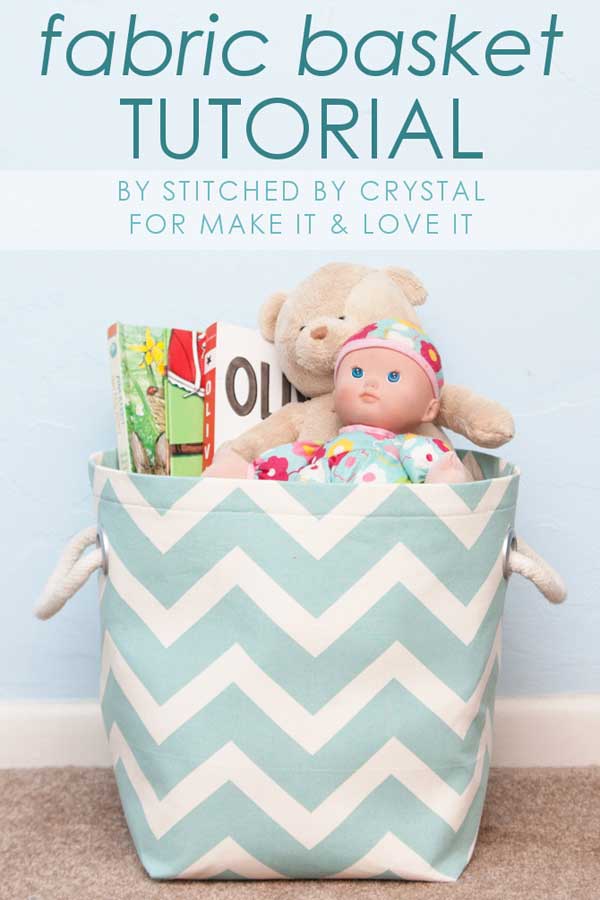
Gather up loose items in your home with a DIY fabric storage basket.
Crafted from sturdy upholstery fabric, these baskets can hold toys, winter gear, accessories, blankets, or towels. Add stylish thick rope handles threaded through metal grommets for a pro touch.
13. Bedside Book Storage Organizer | Tutorial: sewcanshe.com
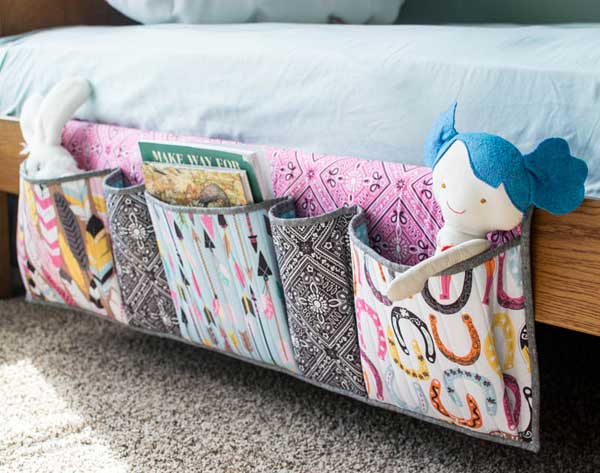
Simplify your bedtime routine with this clever pocket organizer. It slips under the mattress, creating vertical pockets for easy access to your child’s favorite items like pacifiers, toys, and books.
This DIY project is quick and easy, taking just a few hours to complete, or even faster if you have a monogramming machine.
12. DIY BELT STRAP BIN | Tutorial: thehandmadehome.net
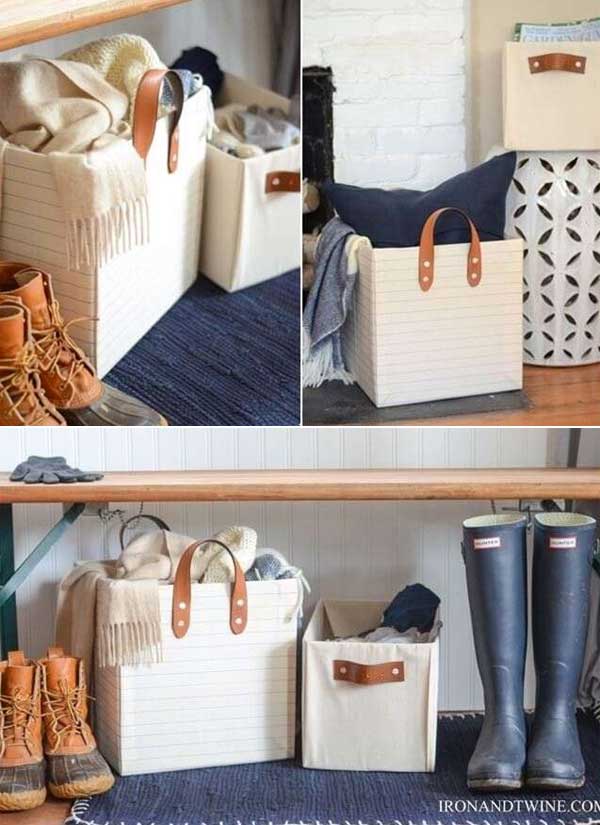
Upgrade plain fabric bins with this creative DIY project using an old leather belt. Cut the belt into strips and attach them to the bin using binding screws.
The camel-colored leather adds sophistication against the cream fabric. Adjust the strip ends for a custom look or keep them flat for a classic touch.
11. Fabric Organizer for Ironing Board | Tutorial: flamingotoes.com
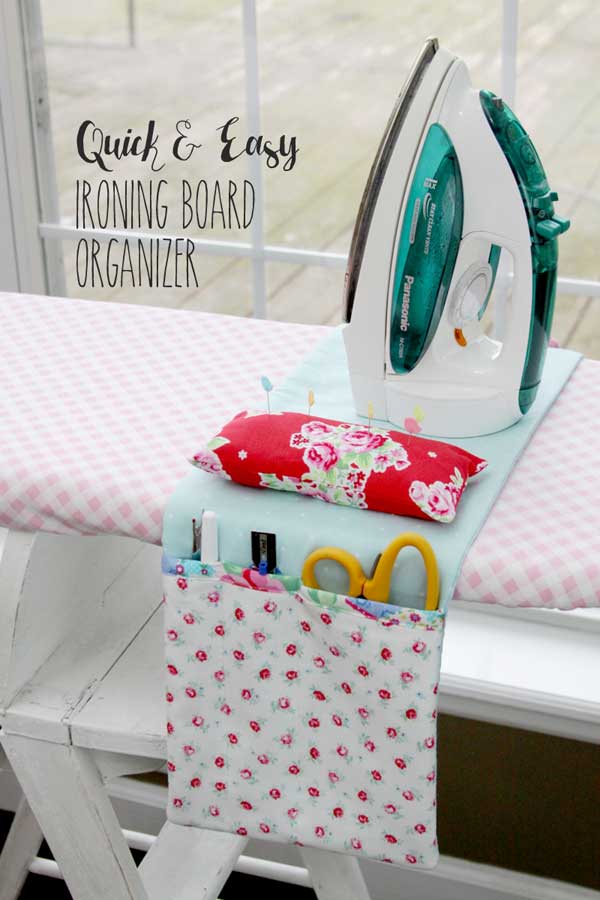
In your sewing or craft space, don’t forget the trusty ironing board.
Keep your essential tools within reach with this handy ironing board organizer.
It’s a simple fabric storage bag with pockets on each end for scissors, markers, seam rippers, and more. Adjust pocket sizes with easy sewing.
10. Round Fabric Bin | Tutorial: thisbigoaktree.com
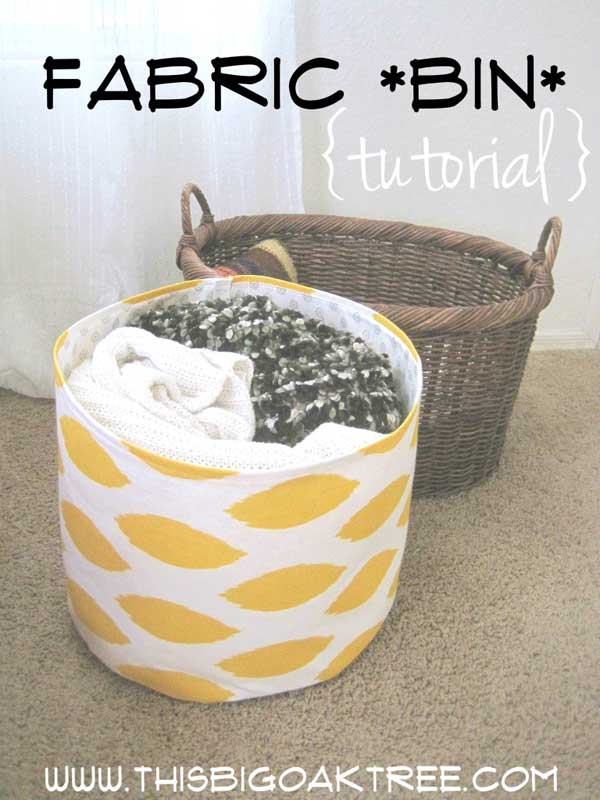
Transform your living room or kids’ bedroom with a touch of creativity. All it takes is a couple of yards of fabric to craft a stunning round storage bin.
Whether you opt for a trendy print or a bold, vibrant color, these sizable bins not only provide practical storage but also become captivating focal points in your space.
Keep blankets, pillows, or towels neatly tucked away while adding a touch of style and organization to your room. It’s a simple yet effective DIY project that can elevate your home decor.
9. Owl Remote Control or Sewing Tool Storage Caddies | Tutorial: themoderntomato.com
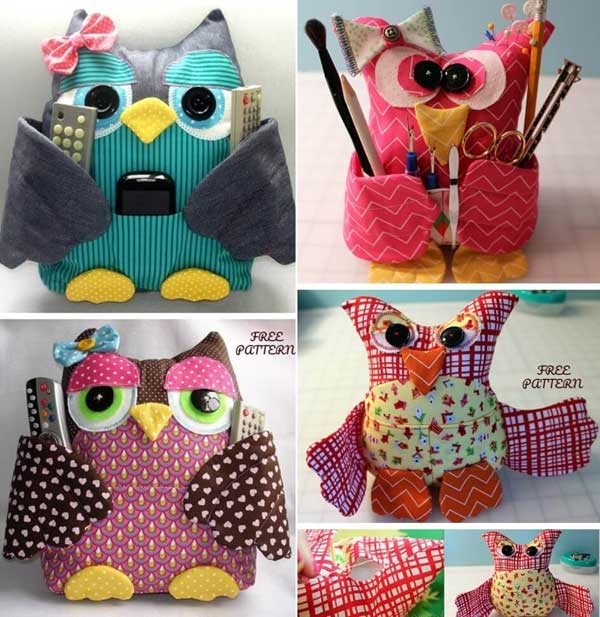
Are these owl storage caddies the cutest or what? They’re fabric-made and perfect for your living room, office, or craft room.
Pick vibrant colors to liven up any space. These critters come to life with a mix of patterns, tones, and solid fabrics.
Use the wings or front pockets to store remote controls, scissors, pens, or small essentials. A delightful and practical addition to your space!
Image Source: amazinginteriordesign.com
8. Fabric Storage Boxes | Tutorial: makeit-loveit.com
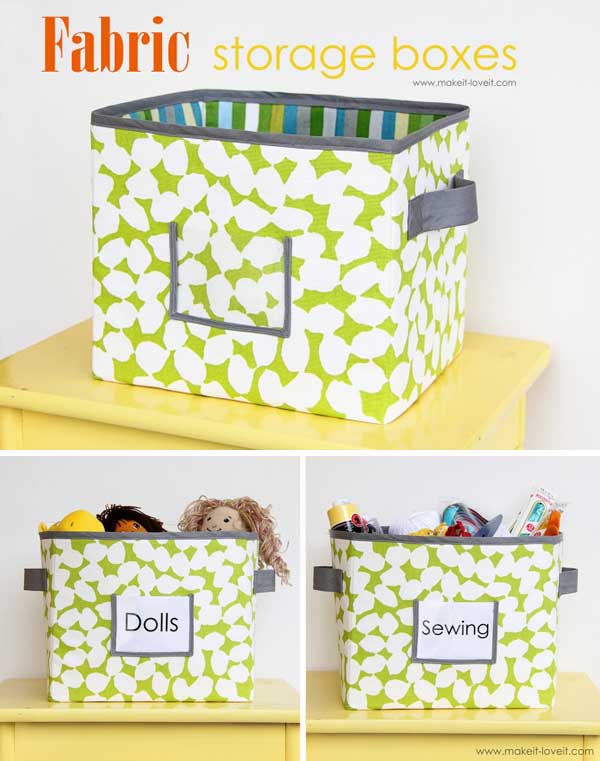
Tidy up your bookcase or cubbies with fabric storage boxes. They have sturdy sides to stay in shape, even when filled, and the classic cube design fits perfectly on a shelf.
For extra organization, attach a clear pocket for labels. Whether you’re organizing toys or kitchen items, these colorful baskets are a fun and attractive choice.
7. Fabric Pocket Organizers for the Kitchen Cupboard | Tutorial: littleadelaidekate.blogspot.com & roulersavie.com
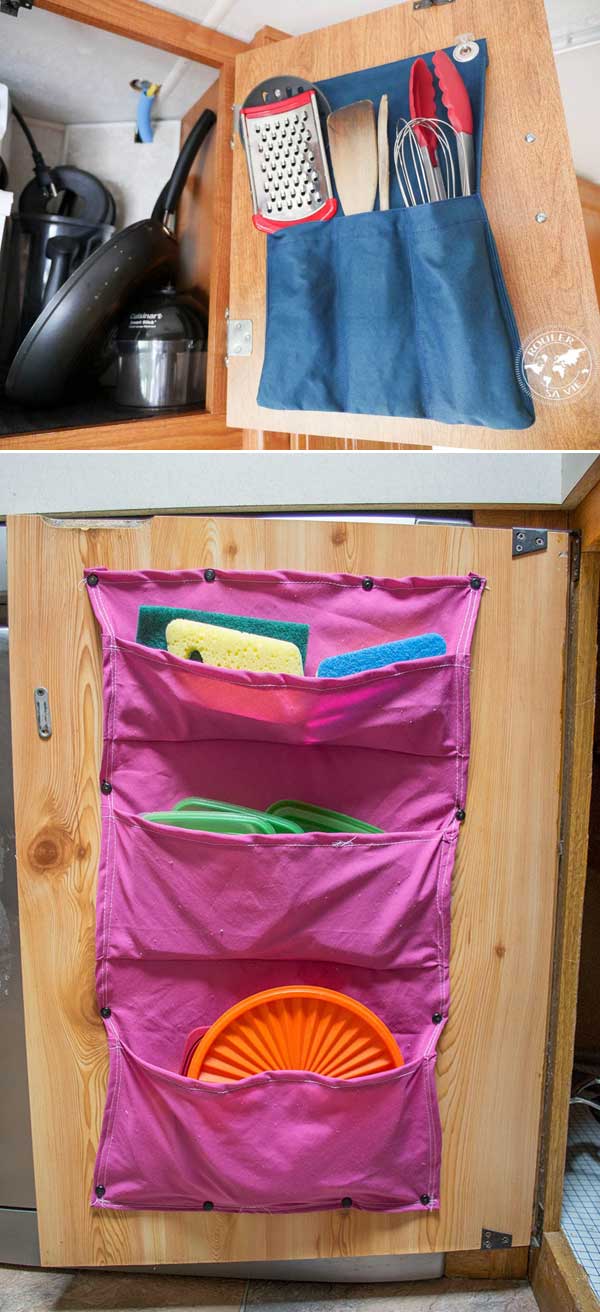
Got messy, overflowing kitchen drawers? Say goodbye to the chaos with a simple DIY fabric pocket organizer.
The tall, narrow pockets keep your utensils and tools visible, and the flexible material accommodates everything from whisks to wine openers.
Attach the pockets to the inside of your cabinet doors for a space-saving solution that opens up your drawers. Enjoy a clutter-free kitchen!
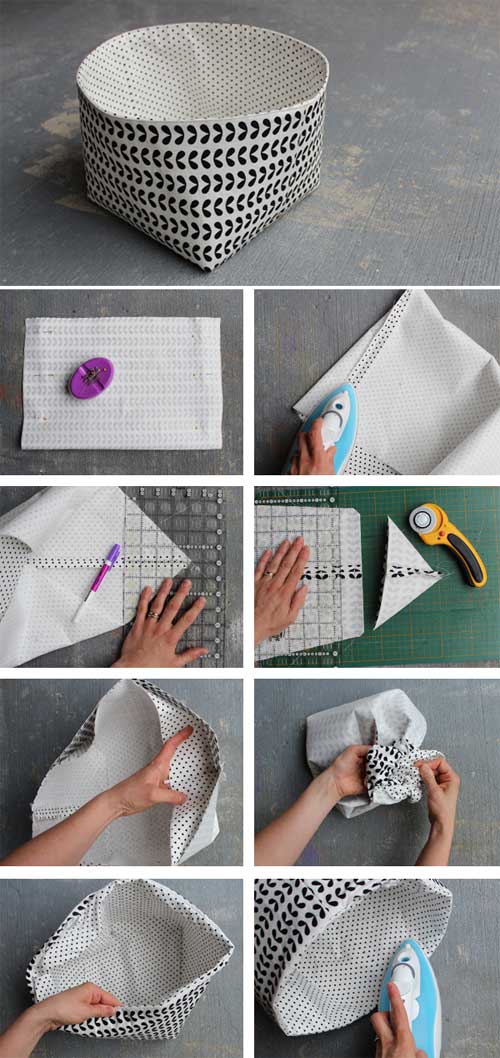
6. Reversible Fabric Storage Bin | Tutorial: haberdasheryfun.com
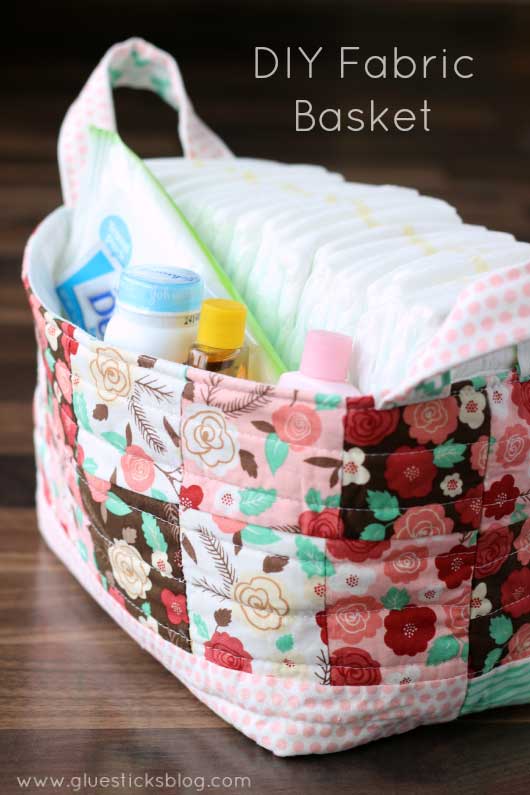
5. Fabric Diaper Bag | Tutorial: gluesticksblog.com
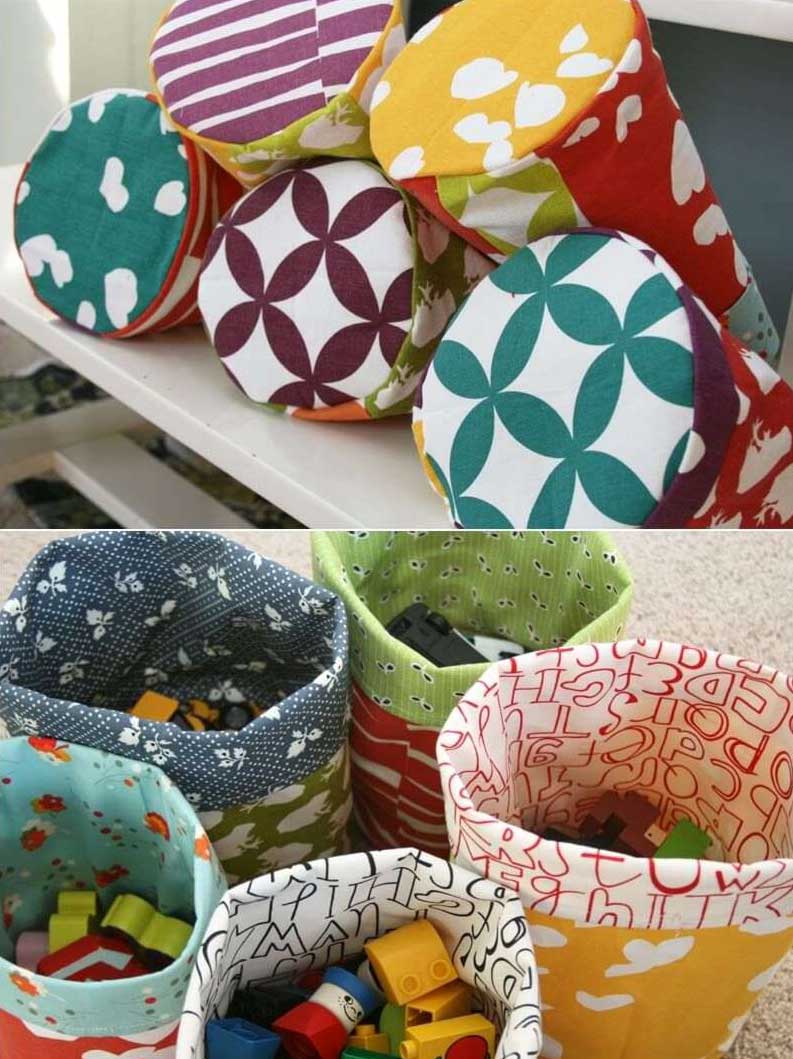
4. Round Bottom Fabric Storage Bins | Tutorial: filminthefridge.com
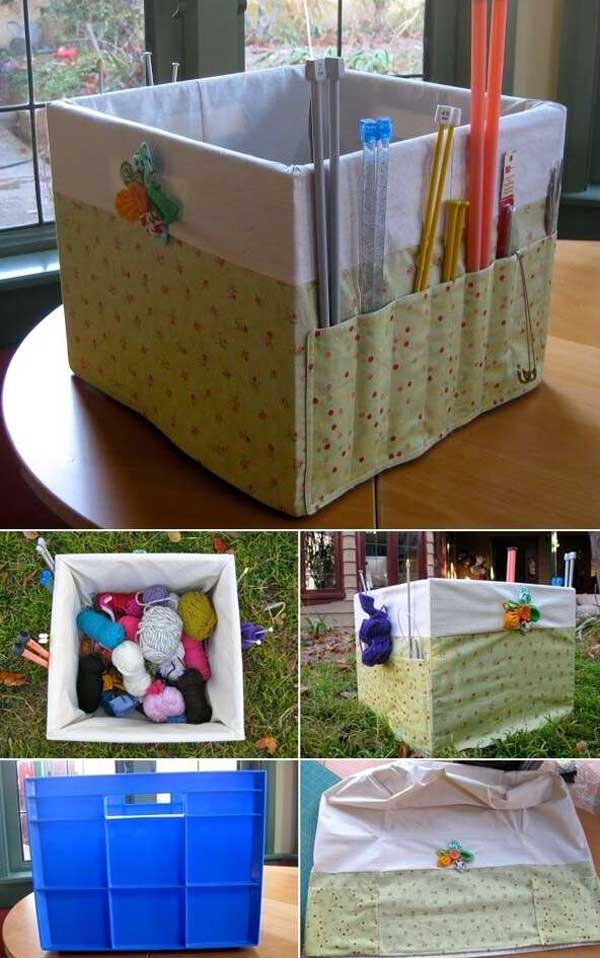
3. A Fabric Covered Milk Crate Bin | Tutorial: mypatchwork.wordpress.com
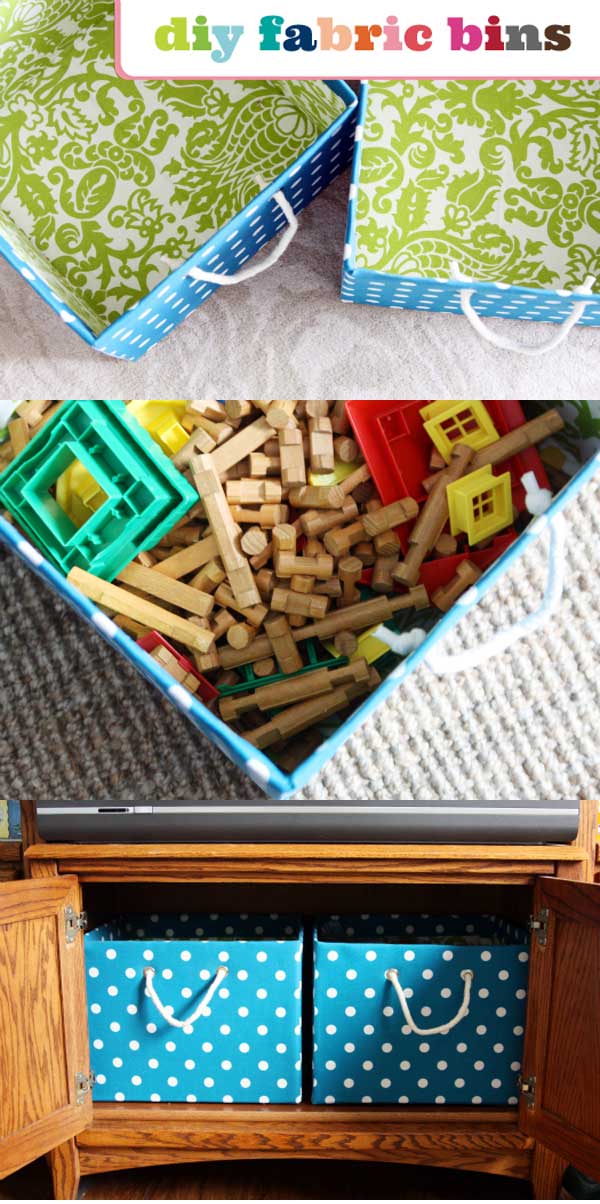
2. Fabric Bins with Handle Openings | Tutorial: makeit-loveit.com
1. Contrasting Color Mixed Fabric Bins | Tutorial: iheartorganizing.com
How to Make Fabric Boxes with Lids:
Materials:
Fabric (choose your preferred color and texture)
Fabric scissors
Sewing machine or hand sewing needle and thread
Ruler
Pins and needles
Cardboard (for making box templates)
Steps:
Measure and cut: Measure and cut your fabric into the desired size for the box and lid.
Sew the box: Sew the sides of the fabric together to form the box shape.
Create the lid: Repeat the same process to create a lid for the box, ensuring it’s slightly larger than the box opening.
Attach the lid: Sew the lid to the box, leaving one side open for easy access.
Finish: Turn the box right side out and you’re done!
This simple tutorial will help you create your own fabric boxes with lids. Enjoy your DIY project!